Tuesday, June 18, 2013

How to make aloo paratha ~ with step by step pictures


aloo paratha

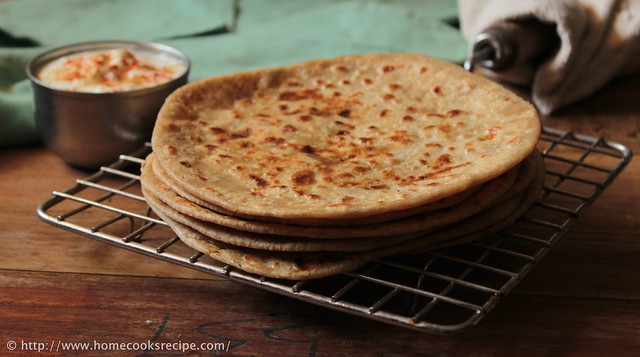
Aloo Paratha, i make it quite often. but never posted here, as i always make it for dinner and as i never click pictures after sunset. today broke the rule and made for lunch. as i was keen on making north indian thali, we had aloo paratha's with khichdi and dal. which turned out into a good and satisfying meal.


Aloo Paratha Recipe

stuffed aloo parathaPrep Time20 mins 
Cooking Time: 10 mins  
Serves2
Recipe CuisineIndian
Recipe TypeBread
makes  6-7 paratha's


Ingredients:


Atta / Wheat flour - 2 cup's / 400 gms
Potatoes - 3
Oil - 1/2 tsp
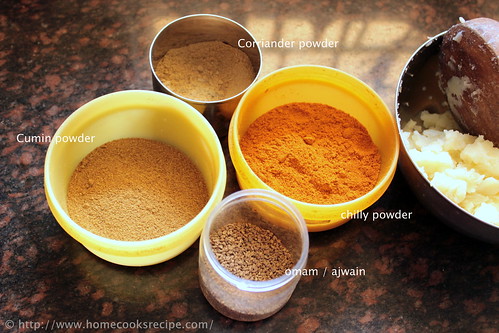
Omam / Ajwain - 1/2 tsp
Corriander powder - 1 tsp
Cumin powder - 1 tsp
Chilly powder / sambhar powder - 1 tsp (or use finely chopped green chilly)
Finely chopped corriander leaves - 2 tsp
Ghee - 2 tsp's (for making paratha's)


ingredients for aloo paratha

Method:

aloo for aloo paratha

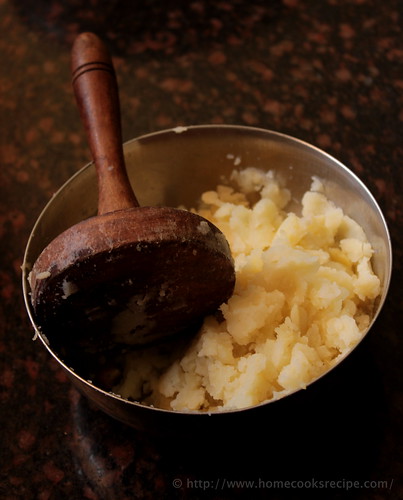
Pressure cook the potatoes for about 5 whistles at least. peel its skin and mash it nicely. let it cool.

ap 1

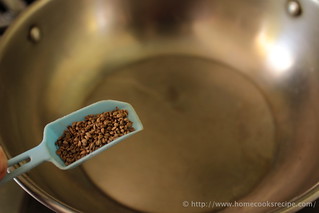
In a pan, heat 1/2 tsp oil, add ajwain seeds.

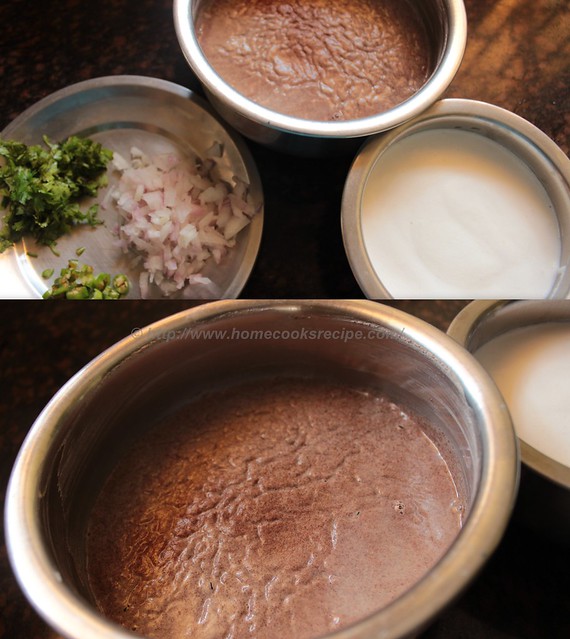
tip: you may add very finely chopped onions and green chilli for a variation.

ap 2

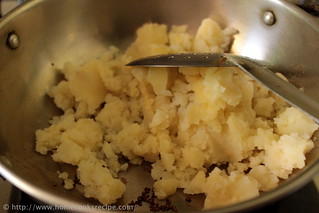
Then add in the mashed potatoes. and mix well with ajwain.

stuffing for aloo paratha

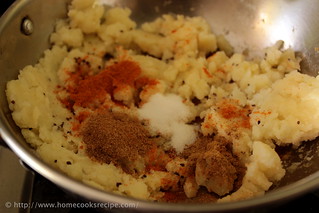
Add corriander powder, cumin powder, chilly powder and salt to taste.

aloo paratha stuffing

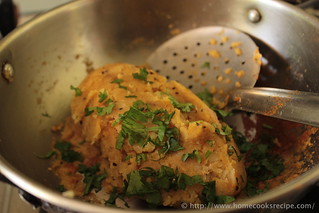
Mix well with the potatoes. add in the chopped corriander leaves and mix all together. it should all come together. let the stuffing cool down.

ap 3

tip: it is very important to let the aloo stuffing to cool completely. else, you cannot roll the paratha with the hot stuffing in. it peeks out.

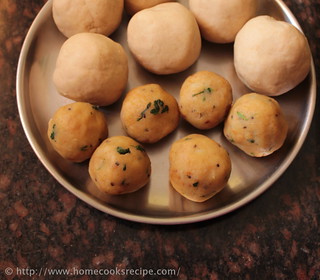
Meanwhile when the stuffing cools down, prepare the atta. In a wide bowl, mix wheat flour and little bit of salt. add water and knead like we knead our poori dough. so do not knead so soft, as we do for phulka's or chapathi's. Divide the dough and shape them into big balls of a tomato size. Also shape the aloo stuffing into small balls that of half a lemon sized ones.

tip: aloo stuffing balls should be half the size of the atta dough balls.

ap 4

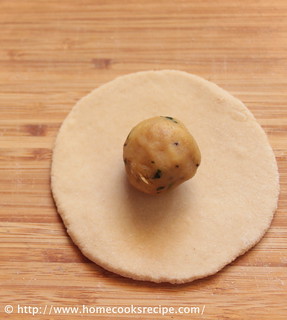
Take a atta dough ball and and roll with rolling pin or flatten on your palm, it should be just of your palm size. flattening evenly is very important.  Place a aloo stuffing ball in the centre.

ap 5

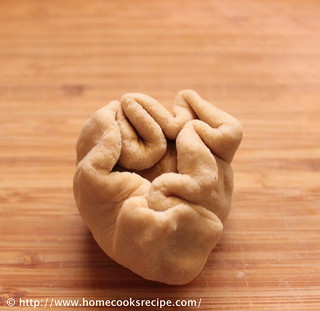
Now bring the corners all together and shape like we do for modak.

ap 6

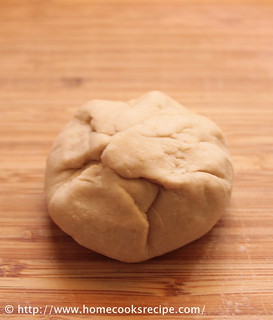
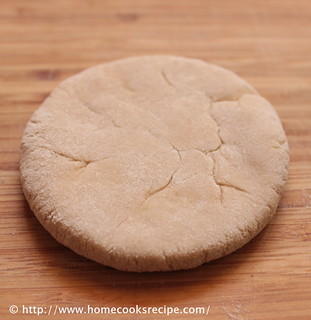
Close the stuffing thoroughly and flatten with your palm with little pressure.

stuffed aloo paratha

Dust with flour, so that it will be easy for rolling.

ap 7

Roll it lightly and never give pressure to the centre part. if needed dust with flour. even, if the stuffing peek's out, do not worry.

ap 8

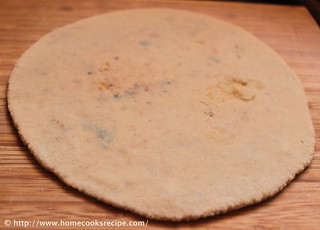
This is how, the fully rolled paratha look like.

ap 10

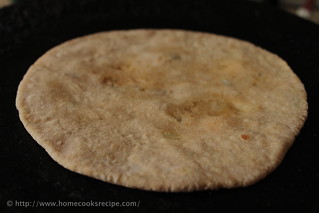
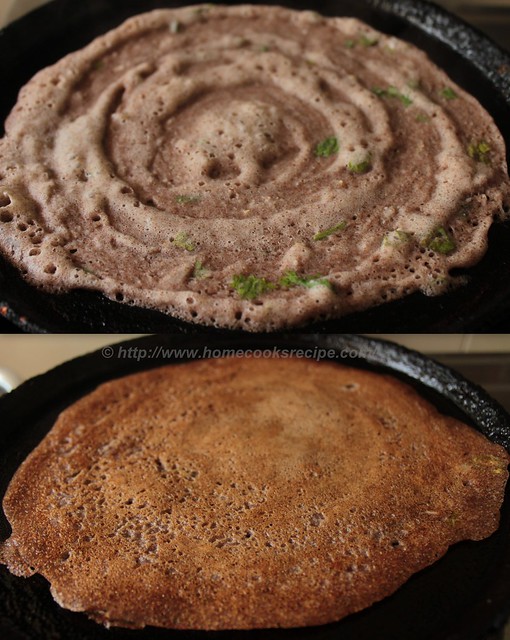
Heat a Griddle/dosa pan, put the rolled paratha and wait for it to get cooked.

ap 12

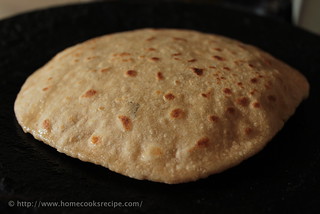
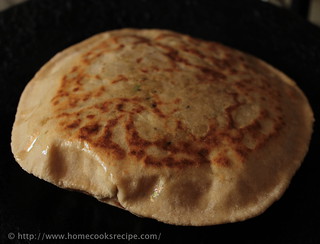
When the paratha puff's up, apply ghee on both sides of the paratha and cook, till you find brown spots.

ap 13

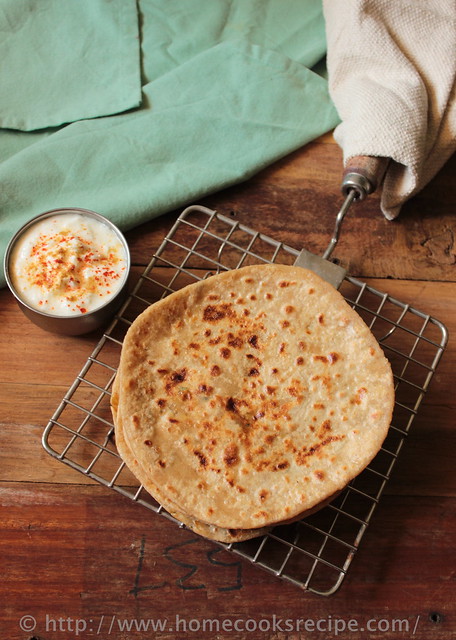
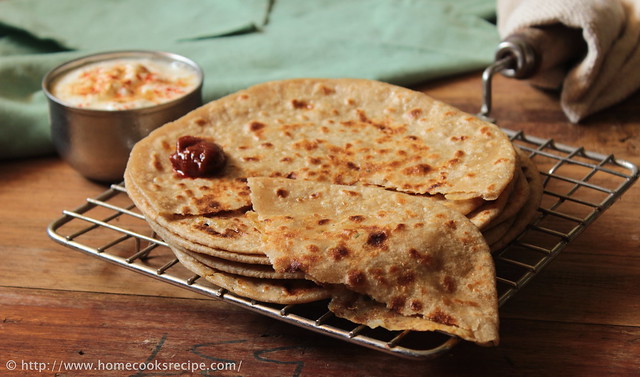
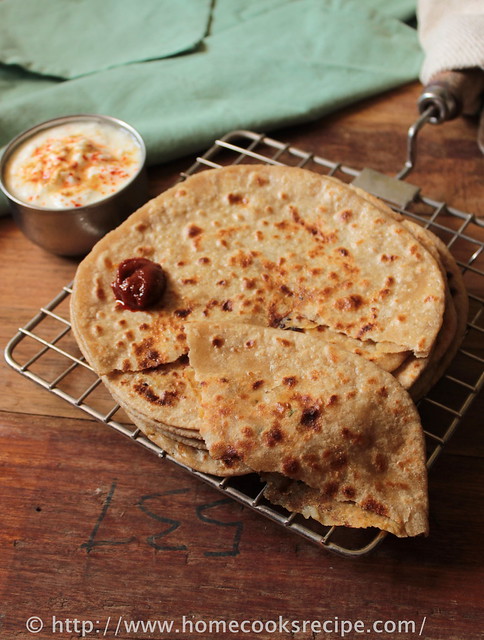
Transfer the paratha's to a serving plate. if intended to store and eat later, then wrap them up in aluminium foil.

aloo parathas

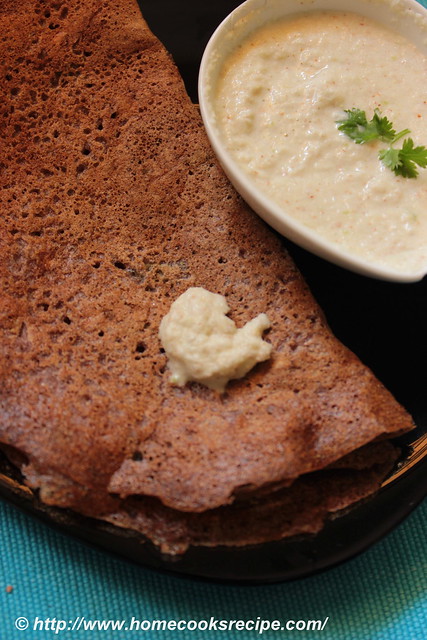
Serve aloo paratha's hot with curd and pickle. sprinkle chilly powder and cumin powder over curd before serving.

stuffed aloo paratha

Notes:

Do not try to use hot aloo stuffing before rolling.

While rolling, if little bit of stuffing sticks to your rolling pin, then scrap it off, dust some flour and then start to roll. do not keep the rolled paratha in the rolling surface, it furthur sticks. so as soon as you roll, put it on griddle.

aloo paratha with curd and pickle

We like these aloo paratha's a lot. whenever i make it, i get compliments without fail. do try it out!

Today i cooked lunch leisurely. from next week, i have to pack lunch for my son. i do not know, how am i going to manage cook so early. also i did not train my son to eat alone all these days. it is going to be a different learning phase of life for both of us!

Tuesday, June 11, 2013

chow chow recipe ~ kootu and thuvayal

I rarely cook with this vegetable before. but after trying thuvayal, i started to cook often. chow chow kootu is the second recipe, i cook. But my personal favorite will always be this thuvayal! To know more and to find nutritional information about chayote/chow chow check here.

chow chow thuvayal

                                              Chow Chow Thuvayal / Chayote chutney


Chow Chow Recipe

Prep Time05 mins 
Cooking Time: 20 mins  
Serves2
Recipe CuisineIndian
Recipe TypeVegetable

Ingredients:


Ingredients:

Chow chow / chayote - 1
Sunflower oil - 2 tsp's
Urad dal - 2 tsp's
Dry red chilly - 3 or 4
Tamarind - a small pinch
Grated coconut - 2 tbsp's
Salt to taste
Water - 3 tsp's


for tadka:

Oil - 1/2  tsp
Mustard - 1 tsp
Curry leaves - 1 sprig

Method:

First wash the chow chow and peel its skin. then cut into half and remove its seed and white veins. chop them into chunks and set aside.

In a Pan, add 1/2 tsp of oil and heat it. once the oil is hot, add urad dal and dry red chilly. roast till the urad dal turns into golden color. remove the roasted urad dal and dry red chilly to a separate bowl and set aside.

In the same pan, add remaining oil and add in the chopped chow chow. saute them in medium flame for about 7 - 10 minutes, till it is cooked soft. add tamarind and also roast along in the last minute.

Transfer the sauteed chow chow to your chutney jar, add in the roasted urad dal, red chilly and grated coconut. add salt to taste. grind it coarsely first. then add water and grind into a thick chutney. transfer to a serving bowl.

For tadka, heat a small tadka pan, add 1/2 tsp oil, 1/2 tsp mustard and curry leaves. once the mustard splutter, add the tadka to the chutney / thuvayal.

Serve with rice and rasam combo. this chutney tastes good with dosa too.

Note:

You can skip grated coconut and make this chutney as such.


 Chow chow kootu / Chayote Dal

chow chow kootu


                                                      Chow chow kootu / Chayote Dal

Ingredients:

chow chow - 1
moong dal / paasi paruppu - 1/4 cup
turmeric powder - a pinch

to dry roast and grind:

dry red chilly - 3
cumin - 1 tsp
grated coconut - 3 tsp's

for tadka

oil - 1/2 tsp
mustard - 1/2 tsp
split urad dal - 1/2 tsp
dry red chilly - 1 (broken)
asafoetida powder - 1/4 tsp
curry leaves - 1 sprig

Method:

First wash the chow chow and peel its skin. then cut into half and remove its seed and white veins. chop them into small pieces and set aside.

Heat a pan and dry roast the cumin, dry red chilly and grated coconut. grind into a smooth paste with little water.

Wash and cook the moong dal  with a pinch of turmeric in 1 cup of water. when the dal is half cooked, add in the chow chow pieces to the dal and cook for another 5 minutes. chow chow and dal  has to get cooked well(the whole process may take 15 minutes).

Then add the grounded mix to the pan and let it boil for a minute and transfer the dal to a serving bowl.

For tadka, heat a tadka pan, add oil and heat it. add mustard, urad dal and dry red chilly. when the mustard splutter, add asafoetida powder and curry leaves. transfer the tadka to the dal.

Notes:

You can add 1 green chilly and crushed garlic, while cooking the dal and chow chow together. this way, you can get a different taste.

 Don't pressure cook the dal and vegetable. the texture and taste of the dal gets spoiled, when pressure cooked. so best to cook in stove top.

You can also make this with chana dal instead moong dal.


Thursday, June 6, 2013

Ragi dosa with dosa batter ~ Fermented Ragi Dosa

I was desperate to introduce ragi to my son. as he did not like ragi in porridge form, i had to find other ways. last month, i just added ragi flour to the dosa batter and made dosa. it came out well. but it did not taste good also my kid did not like it. then my friend suggested me to ferment ragi and then mix with dosa batter. this worked out very well today. the dosa tasted superb and my kid ate it without any complain. i am going to make these dosa's quite often.

IMG_2648

Ragi tastes better, when it is fermented. so the day before, mix the flour in water in thick consistency and leave it in room temperature to ferment. this way, ragi dosa tastes good! Highlight of this recipe is, you will not feel the raw smell of ragi and ragi gets cooked quickly.

serves - 3
requires overnight fermentation
cooking time - less than 2 mins

Ingredients:

Ragi Four - 150 gms
Water - 1 cup
Idly / Dosa Batter - 1 cup
Finely chopped onion - 3 tbsp
Finely chopped green chilli - 1 tsp
Finely chopped corriander leaves - 2 tbsp


Starred Photos1

Method:

To make ragi dosa's next morning, mix ragi flour with water without any lumps. mix should be thick like idly batter. mix and close in a bowl and put it on your kitchen top the previous day evening. It takes 12 hours to ferment.

Starred Photos2


Next day, mix the fermented ragi mix with dosa batter, add salt to taste and add finely chopped onions, green chilly and corriander leaves. stir well and make dosa's.

Serve with coconut chutney, it makes a yummy combo!

IMG_2641


You cannot make very thin dosa's with this batter, as it is not easy to spread on the tava. also leave a bit of oil extra, to make the dosa little crispier.

IMG_2653

Notes:

It is not good to eat ragi dosa at night, as it takes long time to digest. Ragi is good to have for break-fast.

If serving for kids, skip green chilly and onions.


Related Posts Plugin for WordPress, Blogger...