Wednesday, March 31, 2010

Sweet Pizza with Coconut

This is one of my Culinary Creation. I loved it very much. Have to prepare this again for this weekend. such an irresistable sweet pizza. Its such an easy pizza kind. If you have a pizza base on hand, you can prepare this in minutes. it will be a great Party food.I prepared Coconut Toppings like Our Coconut Burfi and spread it over the ghee coated pizza base. This is My entry for Indian Flavoured Pizza's Hosted by me for Cilantro's Global Kadai.


Sweet Pizza with Coconut and Raisins

Ingredients:

Pizza Base - 1
Ghee / Butter - 1 tbsp
Sugar - 5 tbsp's
Grated Coconut - 1 cup ( i grated half of a coconut for a pizza base)
Raisins - 1 tsp
Cardamon -2

Coconut Pizza before and after baking

Method:

Pre-heat the oven at 200C / 400F.

Apply Ghee on both sides of the Pizza Base .

To Prepare the Coconut Toppings, Heat a Pan, and add the Grated Coconut, Sugar and Crushed Cardamon. Mix them for a minute, till they come together. This step takes just one minute.

Now spread the Coconut Toppings on top of the pizza base and add some raisins over it.

Bake in Pre-heated oven at 200C for about 10 minute's. and Broil or Grill at 250C for 3-5 minutes.

Remove from the oven and serve Hot.

A slice of Pizza


I prepared these Sweet Pizza's very Quickly. This will be an absolute Treat for the Sweet Lover's. If you have Diabetic Guests, add some Jaggery instead of Sugar. also reduce the Jaggery quantity and prepare the same way and serve them.

Thursday, March 25, 2010

Baking in OTG


If you are looking for OTG baking recipe's, scroll down. some basic questions i usually get from my reader's are shared here to make it useful to all.


Note:

I have been getting lot of questions on what OTG and which capacity to buy. I am just recommending Morphy richards as i have been using it for the past 6 years. Regarding capacity for a small family of 4 go for 18 trs or above. If you are serious in baking go for big capacity like 40 ltrs or more.

What is OTG?

The abbreviation for OTG is Oven Toaster Griller. In layman's point of view, You can bake a cake, toast a bread and also grill a paneer, etc.

What is the difference between Microwave Oven and OTG? 

In Microwave oven, cooking is done through heat waves. Its more similar to our Pressure Cooker. There are microwave Oven's with Convection and Grill mode, in which you can bake and grill. so understand, if yours is just a microwave without convection, you cannot bake!!

In OTG, baking is done with the heat of rods. its more like a traditional oven. Whenever i bake a cake in my microwave, the top part of the cake becomes harder. but in OTG, cake turns out as good as in the bakery shops. so in my opinion, there is difference in baking in microwave and in OTG.

What to Buy Microwave oven or OTG?

It depends on your needs. if you are interested only in baking cakes/cookies or making some Grilled Non-veg dish, you can blindly go for OTG's.

But you cannot use the OTG for cooking or re-heating purposes.

What I do with my Microwave is?

I boil milk, re-heat my  rice, sambhar or curry. i steam vegetables in my microwave. My cooking gets over fast, with the use of microwave oven. I also cook my basmati rice in it, as it comes out grains apart.

So, see for what purpose you are going to buy and decide accordingly.


 How to Use OTG?

First Refer the Manual and wait for the demo person to give you the demo.

How to Pre-heat the oven?

Both the Top and Bottom rods HEATED UP/ Toast Mode:

Pre-Heating the oven is must, before you start to put some stuff into the oven. Heating up both the top and bottom rods at certain temperature mentioned in the recipe for about 10 minutes is Pre-heating the oven.

You could use this toast mode(both top and bottom rods heated) for pre-heating the oven and also use the same mode to toast the bread.

Bottom Rods heated up / Bake mode:

If the bottom rods alone heats up, then its the bake mode. cake has to be baked only in this mode!
Be it cakes, cookies, bread, pizza's, anything which calls for baking should be done only in this bake mode.

Grill Mode/ Top rod heats up:

What i do with Grill mode is, after baking cakes, pizza's,bread, cookies anything, i grill them for 2 to 3 mins, to get the crispier/browning effect on the top of cakes.etc.

You can also grill paneer and some non-veg stuffs with the rod, that you would have got.

Why the Cake did'nt rise in bake mode?


* Make sure to use aluminium tin/moulds for baking cake.
* Also line the tin with butter paper or aluminium foil sheet.
* Pre-Heat the oven for 10 min at 180C.
* Bake the cake in bake mode (Bottom rods alone should heat up) for about 35 - 45 mins. at 180C or the temperature specified in the recipe.
* Make sure to place the wire wrack in the middle wrack.

*Cake has to be baked for at least 30-40 mins. cupcakes takes 12-15 mins. so wait for enough time to get it raised and baked.

* If you have used eggs, baking powder, baking soda properly, the cake would definitely rise.

Hope i clarified you as much as i can. if you have further doubts, feel free to mail me at lavraj2k4@gmail.com

Happy Baking!!


-------------------------------------------------------------------------------------------------------

OTG Recipe's:

I bought my OTG, in the mid of last year. But i kept it unused for 4 months. I read lots of blogs, sites and book's, learned few techniques of baking. I asked my blogger friends, so many doubts, they were kind enough to clarify me in instant. with all the theory learned, i started to step on to practical with my OTG
1 year back. Here are my few experiments.

Basic Chocolate Cake:


Chocolate Cake Cooling
Pumpkin Pie:


Pumpkin Pie Slice


Brownie:

Almond Brownie

Vanilla Cupcakes:

Walnut Cupcakes with Nutella Frosting

Yet to come Recipes:
Tomato Pizza: with home made pizza base.


I just loved working on the pizza dough. It was a Great pizza experiment day!

Ladenia / Olive Oil Bread: from Rachel's blog.


After tasting these Bread at our last blogger meet, i instantly fell in love with this bread. Thank You Rachel for the Great Treat!

Focaccia:
 I should say, this was super hit at my home.

Few more coming up:


we enjoyed all the three cookies.

I thought i lost all the above pics as the system underwent format recently. but luckily found out at Picasa. I don't want to loose again..thus its here today for your eyes.

Wednesday, March 24, 2010

Paruppu Podi

First let me disclaim, this is not an usual Paruppu Podi. This is prepared to ease the digestion. Usually Paruppu podi mixed with Rice and little ghee is eaten first during Lunch. Paruppu Podi sadham actually stimulates the appetite. Its a healthy start of the meal too. This recipe for paruppu podi has dry ginger(sukku) in it, thus helping easy digestion. People suffering from Ulcer can have this Sukku Paruppu Podi. Dry Ginger will act as a good medicine.

Paruppu Podi

Ingredients:

Tuvar Dal / Thuvaram Paruppu / Red Gram Dal - 2 cup's
Dry Ginger / Sukku - 10 gms ( refer above pic, to know the size approximately)
Jeeragam / Cumin - 1 spoon
Pepper / Milagu - 1 spoon
Asafoetida / Perungayam - 1/4 spoon
Curry Leaves / Karivepillai - 10


Method:

Dry Roast the Tuvar Dal, till it turns to golden colour.
Dry Roast the Pepper, cumin seeds and curry leaves.
Grind the Dry Ginger into fine powder and sieve it finely.
Now Grind the roasted Tuvar Dal + Pepper + Cumin + Curry Leaves + Asafoetida powder + Dry Ginger Powder + Salt to taste. Grind them close to fine. it should be little coarse too.
Now Paruppu Podi ready. store it in air tight container.

2 Food Tablets

Mix 2 tsp's of the paruppu podi to 1 cup of rice, add little ghee / sesame oil and mix. have this paruppu podi rice first for meals.

Typical South Indian Lunch Plate
Meal Today

Paruppu podi sadham 2 urundai, beans poriyal, murungakaai-kathrikaai kaara kuzhambu and Rasam

Do Prepare this and have it for a healthy living!!

Monday, March 22, 2010

Spicy Sweet Potatoes - Indian Style / Sakkaravalli kizhangu Poriyal

Sweet Potato is one of my favourite. In our Village, we cook these sweet potatoes, (sakkaravalli kizhangu in Tamil), by burning them on fire. we remove its outer burnt skin and eat the potato. As a Kid, i will be allowed near stove (viragu aduppu) only if i will eat a burned cooked potato(sutta kizhangu). It's so healthy Root too.

Sweet Potato Roast - Indian Style

On moving to the city, i attempted cooking it on stove flame, but it did'nt taste as good as the one's cooked with viragu aduppu. The recipe, that iam going to share is very simple, but it will work Great. If you love sweet potato, then do try this for sure.

Sakkaravalli kizhangu poriyal
meal today, with rasam, sakkaravalli kizhangu poriyal.


                       Spicy Sweet Potatoes - Indian Style  / Sakkaravalli kizhangu Poriyal


Ingredients:


  • Sweet Potatoes / Sakkaravalli Kizhangu - 4 (or) 300gms
  • Big Red Onion - 1
  • Oil - 2 tbsp's
  • Mustard - 1/4 tsp
  • Curry Leaves - 5
  • Chilli Powder / Sambhar Powder - 2 tbsp's
  • Water - 1/4 cup
  • Asafoetida powder - 1/4 tsp

Method:

Chop one big red onion finely.

Trim the Head and tail of the sweet potato and peel its skin. wash them. Chop them in round shapes and keep aside. they soon change colour, so you soak them in water, till it is to be added on to the pan.

Heat a Pan, add oil & heat it. add mustard, let it pop. add curry leaves & roast it. add 1/4 tsp asafoetida powder.

Add finely chopped onion's and fry them, till they turn translucent. now add the chopped sweet potatoes and mix well with the onion's. add salt to taste and chilli / sambhar powder and mix well.

Now add 1/4 cup water  or to say add water, till the sweet potatoes could immerse in the water on the pan and close it with a lid and lower the flame.

the sweet potatoes gets cooked within 5 mins in the water. now let the sweet potatoes get roasted in the pan for another 3-4 mins. make sure not to burn them.

Serve this spicy sweet potato roast with sambhar rice or with morkuzhambu. i served it with rasam. that was a lovely simple meal we had one day on last week.


Note:

sometimes sweet potato may be new and hard, so it takes lots of time to get cooked. so keep sprinkling water till it gets cooked. overcooking may result in mashy potatoes.


Wednesday, March 10, 2010

Oats Bar - another sweet way to eat Oats

After tasting Horlicks Nutri Bar, i wanted to try a similar one. so yesterday i prepared these oats bar, which is so easy to make and it tasted so good too. the guilt part was adding butter. I reduced the butter from 1/2 cup to 3 tbsp's and as a result of it, i could'nt get the bars so perfect.

Oats Bar

Recipe for Oats Bar - yields 12 bars.
Ingredients:

White Oats - 2 cups
Light Brown Sugar - 1/2 cup
All Purpose Flour / Maida - 6 tbsp's
Butter - 1/2 cup ( i used 3 tbsp's)
Honey - 2 tbsp's
Slivered almonds - 1/4 cup
Black Currant - 4 tbsp's

Method:

Grease a Pan and line it with a baking sheet. Pre-heat the oven to 180c / 350F.

Heat Butter in pan on slow flame. add brown sugar and honey. let them melt and get mixed it slow flame. do stirr in between.

Mix the Oats, Flour, slivered almonds and black currant in a bowl.

Now add the melted butter, brown sugar and honey mix to the oats bowl.
mix them well and spread them on the greased pan. Press them tight and evenly with backside of a spoon.


almond oats bar

Bake them for 25 mins at 180c or till the oats get baked to the golden colour.

After baking, remove from the oven and just mark slices over the oats and let it cool down for 30 mins atleast and cut them.

cool and store them in air tight container.

have these oats bar with a glass of milk for break-fast. i loved the black currant on every bite.

Friday, March 5, 2010

Mysore Rasam

Mysore Rasam became favourite after our recent trip to Mysore. Luckily we had a Nice Restaurant near the place where we stayed and happened to taste all the special dishes of the state. On lunch We loved Rasam very much. after coming home, i prepared Mysore Rasam, but hubby did'nt like it. Then I asked my Kannada Friend for the recipe, and she happily, beautifully narrated the recipe, which i cannot forget so easily. Thanks "A" for sharing your Mom's Special Mysore Rasam.

Mysore Rasam

Recipe for Mysore Rasam:

Ghee - 1/2 tsp

Heat the Ghee in a Pan and fry the following in Ghee.

  • Tuvar Dal - 1 spoon
  • Dhania / Corriander Seeds - 1 spoon
  • Jeera / Cumin - 1 spoon
  • Pepper - 1/2 spoon
  • Dry Red Chilli - 3
  • Asafoetida Powder / Perungayam - 1/4 tsp

Cool the fried items and grind it along with Grated Coconut - 1 spoon
to a coarse texture. Keep it aside.

Take One Tomato and finely chop it. Put the chopped tomatoes in one cup of water and boil it for 5 minutes. till the tomato is cooked and the skin of the tomato separates.

Take a small lemon sized Tamarind and soak it in half a cup of warm water for 10 minutes.

Heat the Tamarind water in a Pan and add Jaggery - 2 tsp to the tamarind water and dissolve the jaggery.

Now Add
-Cooked and Mashed Toor Dal - 3 spoon's
,
- Paruppu Thanni - Cooked Toor Dal water - 1/2 cup,
-Tomato with the boiled water
and
-coarsely grounded powder

to the pan and let rasam boil & switch off the flame.

Heat 1/4 tsp ghee in a small pan, and add 1/2 tsp mustard and 1/4 tsp Jeera & fry it and add to the Rasam.

Add finely chopped corriander leaves - 2 spoon's to the rasam and serve hot with Rice.

Karnataka Rasam

We liked this Rasam very much and it was close to the restaurant's rasam we tasted.

Monday, March 1, 2010

Announcing Global Kadai - Indian Flavoured Pizza

Global Kadai, the Blog event named and created by Cilantro. Global Kadai means, Food’s around globe, in a Kadai. Here Kadai means, the traditional Indian Pan.
Glad to Announce you All,
Global Kadai – March 2010 Edition is hosted here at Home Cook’s Recipe’s.
The Theme for the March Edition is Indian Flavored Pizza.

You all can send in Your entries till April 7th.

Global Kadai Logo

You all can send in Your entries till April 7th.

Pizza is the famous Italian Food. Pizza is a flat bread with sauce, cheese and vegetable topping’s baked in oven. Here when I Say Indian Flavored Pizza, You can indianise the sauce or the topping’s. Get Creative and flavor your Pizza the Indian Way.
Already there are many Indian flavored pizza’s such as Chlli Paneer Pizza, Kadai Paneer Pizza, Paneer Makhani Pizza. You need not restrict only to paneer for topping.
I shall suggest Eggplant, Potato, Palak. I just want the Indian Flavor in the Sauce and the toppings. You can use store bought Pizza base for this. If you don’t have a oven, you can also make it in Dosa Tava. Check my way here.
If you are interested in Flavoring the Pizza base the Indian way, show the Indian Flavor in it. I love adding Cilantro, dill leaves to the Pizza dough. So Run your Creative Horse..
Iam not going to copy - paste the original Recipe’s, I will refer you the links here..
For Pizza Dough Recipe, its from 101cookbooks. Refer Here
For Original Pizza Sauce Recipe, its from Recipezaar. Refer Here
For Pizza Topping Inspiration, its from Baking Obsession. Refer Here

Here are the guidelines for participating in Global Kadai:

1. Use your imagination and creativity to prepare the above recipe using ingredients familiar with Indian Cuisine. Post your entries on your blog during the month of March 2010. There is no limit to the number of entries.
* You can also send me Non-Veg Pizza's.
2. If you already have appropriate entry archived, send it along. But don’t fail to link back to this announcement post and Cilantro’s Blog.
3. Provide a link back to this announcement page and also to Cilantro's page and feel free to use the logo from this url. http://farm5.static.flickr.com/4002/4395034935_273203a87f_m.jpg

Global Kadai Logo
4. Email your entries to glassofhoney@gmail.com with following details
* Your Name
* Blog Name
* Recipe URL / Link
* Recipe Name
* Photograph of final dish.

5. I shall receive the entries till March 31st, 2010.
update: You all can send in Your entries till April 7th. 
 
6. If you don’t have a blog but wish to participate in, then send your entries
with a picture of the dish, your name and recipe to glassofhoney@gmail.com before 31 st March 2010. I will post the recipes with your picture in my blog and include it in the round-up during the 1st week of April.
Looking forward for More Creative Indianised Pizza's.
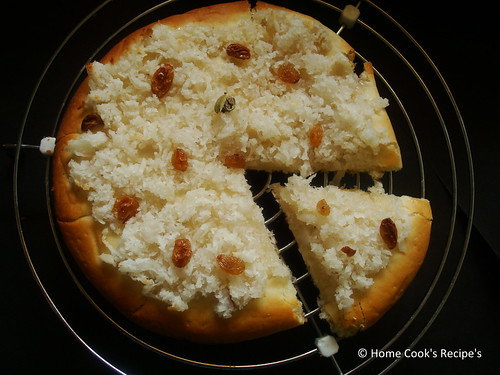
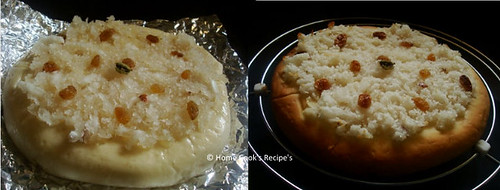
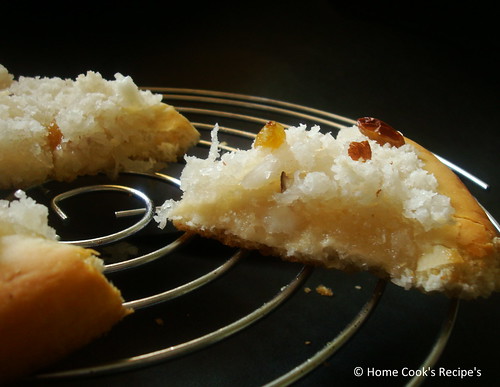
The Mini Pizza in the Logo Picture is the one's that i made with whole wheat flour. I decided to avoid cheese and went with white sauce spread and capsicum topping's. i spiced it up with green chilli's. it tasted Good.
* Please Correct me, if i have gone wrong anywhere in the event announcement or if you have problems or doubts in mailing me your entries. feel free to mail me at glassofhoney@gmail.com

Related Posts Plugin for WordPress, Blogger...