Showing posts with label Baking. Show all posts

Tuesday, August 30, 2016

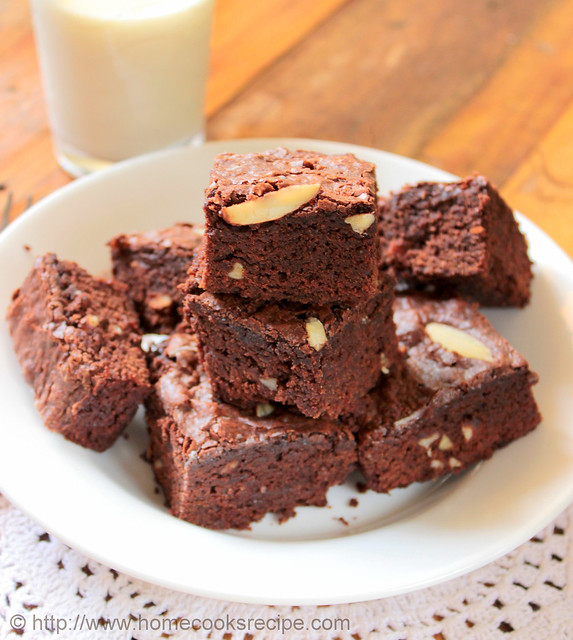
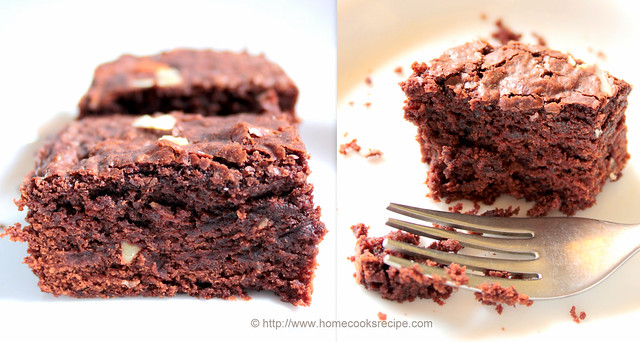
Easy Brownie Recipe

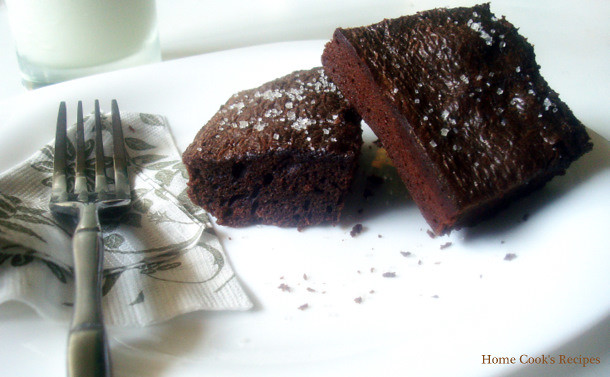
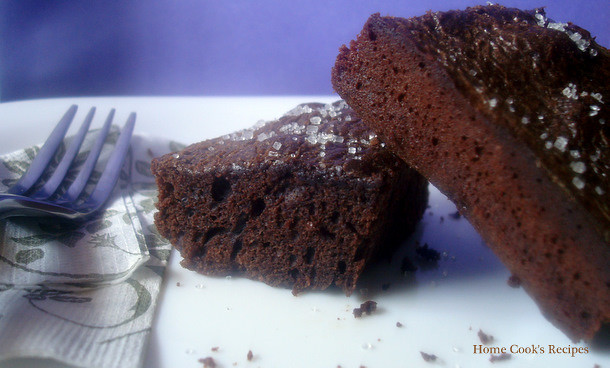
As i always mention on each and every brownie recipe post, i am huge brownie addict. This post is a quick post, as many of my friends wanted to try this brownie and asked me for the recipe. I am posting the recipe here in midst of preparing for my son's exam:)  Yesterday i made oreo brownie for my friends daughter birthday and i shared it on my instagram. Loving all the comments and likes i get there. Between If you are interested in knowing my food trails and my day to day lunch box, please follow my instagram account.


Saturday, April 6, 2013

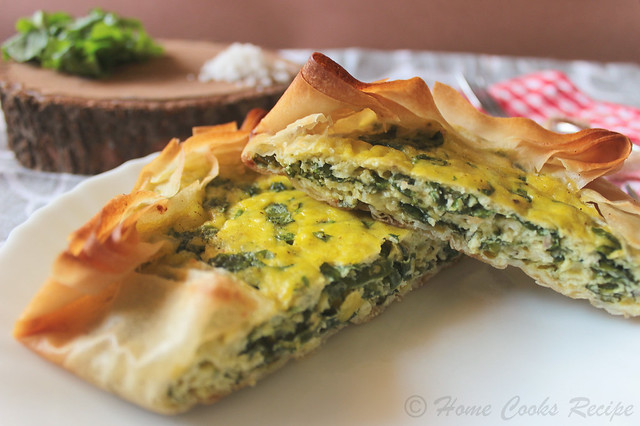
Spinach pie with spring roll sheets

 
 Very few times, we have the ingredients and mood to prepare a dish, that was just shown on TV. This spinach pie is such one dish, which i saw in TLC, prepared by donna hay. instantly, i tried and served for break-fast!
 
 
I bought some spring roll sheets months back, and they were lying in my freezer, the idea of making spinach pie in spring roll sheets was instant and am glad that it worked out perfect.


We all liked this pie, the spiring roll sheets were crisp and the filling was too good and tasted cheesy. who will say no to a iron rich and protein rich filling!
 
                                                      
                                                      Spinach Pie with Spiring Roll Sheets
                                                      ----------------------------------------------
makes 2 pie's
serves - 2 to 3
preparation time - 50 minutes
baking time - 35 mins
recipe source - Donna Hay

----------------------------------------------------------------------------------------------------------------------

Ingredients:

Spring roll sheets / Filo pastry - 6 sheets
Butter - 40 gms (melted)
Fresh Spinach leaves - 200 gms
Panneer - 200 gms
Egg's - 2
Grated Mozzarella cheese - 2 tbsp
Pepper powder - 1 tsp

Method:

Thaw the spring roll sheets for about 30 minutes, before starting.

Pre-heat the oven to 180C /350F.

Wash the spinach leaves and drain them. chop the leaves finely and set aside.

Crumble or grate the paneer and transfer it to a large bowl. add in the chopped spinach leaves to the bowl. crack two egg's into the bowl, mix well with a fork or spoon.

Add salt and pepper to taste. then mix the filling thoroughly. add in the grated cheese and give a final mix.

Line a baking tray with butter paper. Now lay a spring roll sheet on a parchment paper/ foil sheet/ butter paper, brush the melted butter on the spring roll sheet. place another spring roll sheet on top again brush, then top it with another spring roll sheet. Now place the filling in the centre of the sheet and fold the four sides of the sheets. brush butter on top of the folds. if the folds don't hold, just prick in tooth picks to the four corners of the folded sheets. like wise make another pie.

Bake them for about 35 minutes, till the filling is completely set and the spring roll sheets should have turned into light brown and crispier.

Serve the spinach pie warm.
 

spinach pie

 Notes:

This is the best way to make the kids eat greens. if serving for kids, add more grated cheese to the filling.

Serve warm, else it's not so good to eat. you can re-heat before serving.


Thursday, December 20, 2012

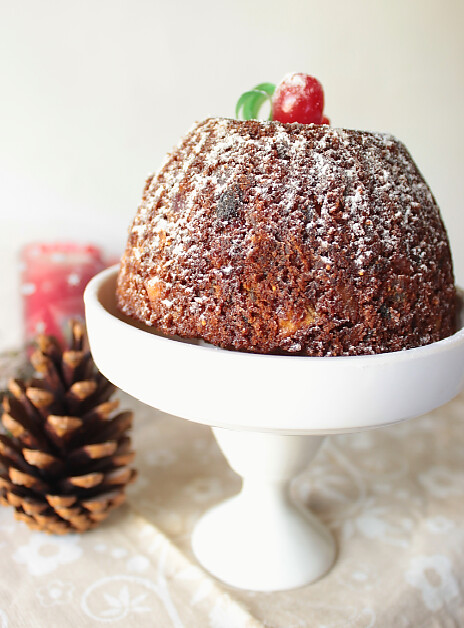
Baked Christmas Pudding


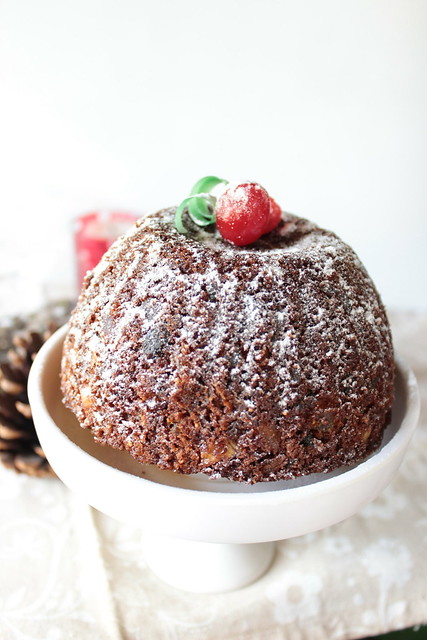
Though i was in idea to prepare traditional christmas plum cake, my Gemini mind as usual took a left turn and here you see is Christmas pudding. This is such a easy recipe and the mixing part takes less than 15 minutes. you can even prepare this pudding without soaking the dry fruits in rum or brandy.

christmas pudding

You know that the traditional pudding calls for steaming, i did not have enough patience to steam. it was  impossible for me to steam for 3 or 5 hours by constantly checking! easier way is to bake them for an hour and half. i made this pudding in two batches, one for steaming and the other for baking. thats when i discovered baking takes less time and effort.

christmas pudding

serves: 6
baking time: 90 minutes
preparation time: less than 20 minutes
200 gms = 1 cup
recipe adapted from here.

Ingredients:

To Prepare fruit mix:

Candied peels mix - 100 gms
Candied peel of a citrus fruit - 50 gms
Dried Fig - 7
Dry grapes / kishmish - 50 gms
Dates - 7
Apricots - 5
Dry Black grapes / Sultana's - 50 gms
Glazed cherries - 50 gms
Tutti fruitti - 1/4 cup
Zest of 1 orange- 1 tbsp
Orange juice - 1/2 cup

Method:

Finely chop the candied peels into small chunks. chop all the other dry fruits, fig, kishmish, dates, apricots, sultana's, cherries and mix with the tutti fruitti and the zest of orange in a pan.

Mix orange juice with the dried fruits and place the pan in medium flame. keep stirring till the orange juice is completely absorbed. it may take uto 3-5 minutes. remove the pan from flame.

If you wish add 40 ml. of  Rum or Brandy, when the mix gets cooled down.

Ingredients for Pudding:

 Fruit mix - 400 gms / 2 cup's
 All purpose flour / Maida  - 200 gms / 1 cup
 Baking soda - 1 tsp
 Baking powder - 1 tsp
 Cinnamon powder - 1/2 tsp
 Nutmeg powder - a small pinch
 Dry Ginger powder - 1 tsp
 Brown sugar - 100 gms / 1/2 cup
 Butter - 100 gms
 Eggs - 2 small

Method:

Brush some melted butter in small aluminum bowl's in which the pudding is to be baked. line the bottom of the bowl's with butter paper and set aside.

Pre-heat the oven at 180C / 350F for about 10 mins.

Sieve the all purpose flour with baking soda, baking powder, cinnamon powder, nutmeg and dry ginger powder. sieve atleast twice so that all get mixed up evenly.

In a small pan, melt the brown sugar with a tbsp of water. need not caramelise. just the sugar crystals has to get dissolved. in another seperate pan, melt the butter and set aside.

In a wide bowl, put the 2 cup's of fruit mix and add flour to it. mix well with a wooden spoon or spatula, next add dissolved brown sugar and melted butter. mix well. finally break in egg's one at a time and mix well. 

Once the pudding mix is ready, divide and transfer to the small individual greased aluminium bowls. fill the bowl's 3/4th so that there is enough space for the pudding to rise while baking.

Finally grease a aluminum foil sheet with butter and place the greased side facing the pudding and cover the pudding bowls. With a thread tie over the neck of the bowl so that the aluminium foil is tightly tied to the neck of the bowl.

Now bake the pudding at 180C for about 90 minutes, till a tooth pick inserted to the centre of the pudding comes out clean. if you are placing a large bowl of pudding, time may differ.

christmas pudding

In case if you are interested in steaming the pudding the traditional way, you can steam in a large pan of boiling water or in a wide pressure cooker filled with boiling water. place a small bowl turned upside down in the pressure cooker and pour 6 cup's of boiling water and place the pudding bowl(with aluminium foil tied) carefully over the bowl turned upside down. close the pressure cooker and do not put the weight/whistle. steam the pudding for about 3-4 hours in medium flame. every 1 hour check the water level and keep adding boiling water so that half of the pudding bowl is in boiling water always. steam till the pudding is done. check by inserting a toothpick to the centre of the pudding comes out clean.

Notes:

Once the pudding is baked, remove the pudding from oven and place on a wet towel, so that it easily comes out of the bowl when pudding get cooled down.

This pudding keeps well for a week after baking, if you want to mature the pudding, keep adding 1/2 tsp of rum or brandy over the pudding  once in 2 days.

This pudding is served along with custard, so you can try serving that way too.

This is such a easy pudding recipe and it turns out perfect. just follow the ingredients. the ratio is 2 cups of dry fruits : 1 cup flour : 1/2 cup sugar : 1/2 cup butter.

 
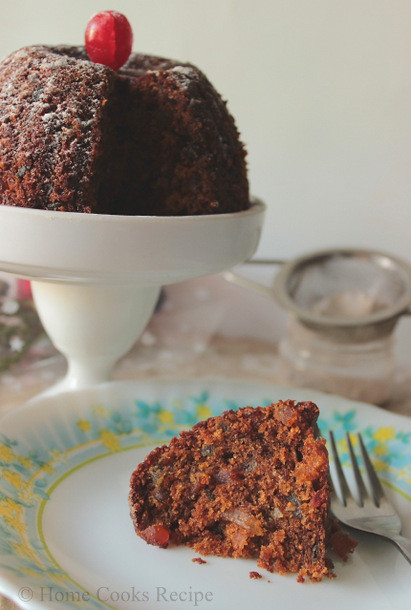
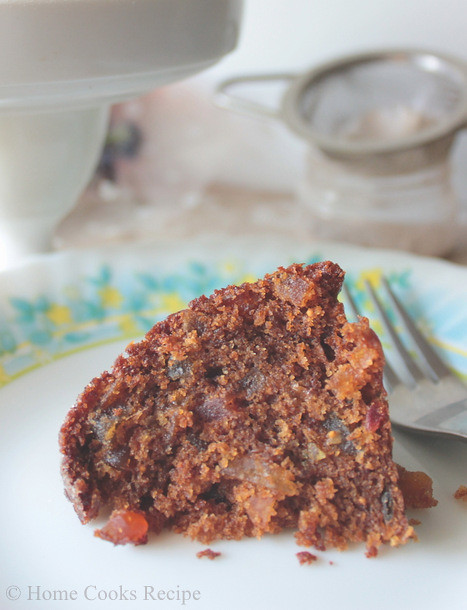
slice of christmas pudding


Wednesday, December 12, 2012

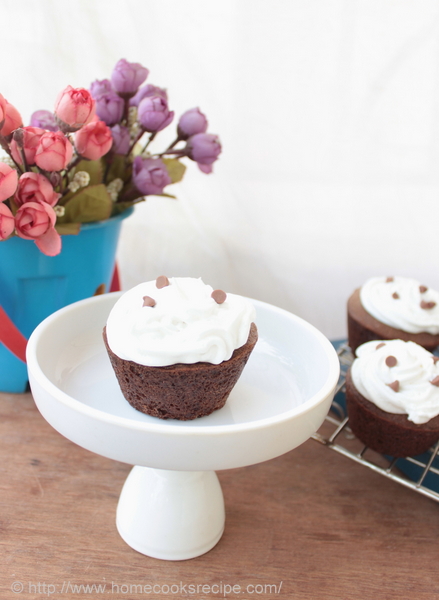
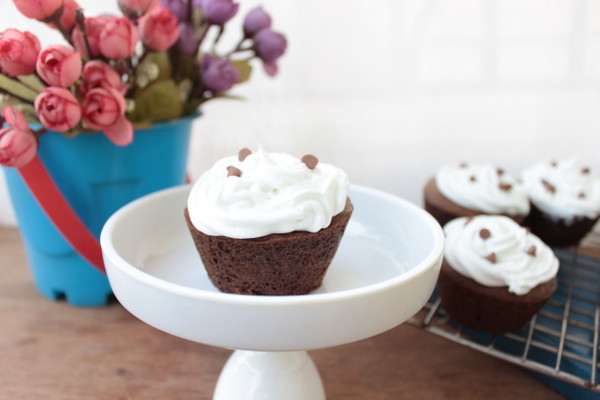
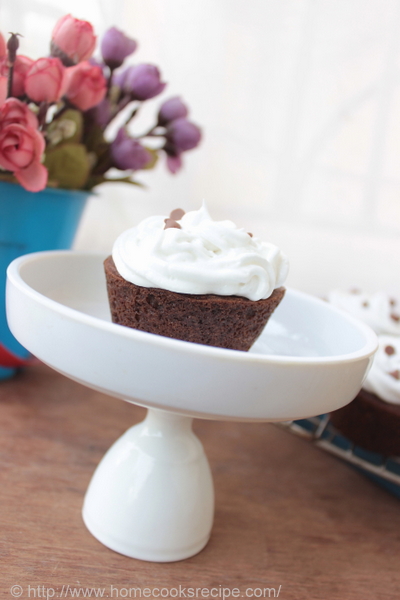
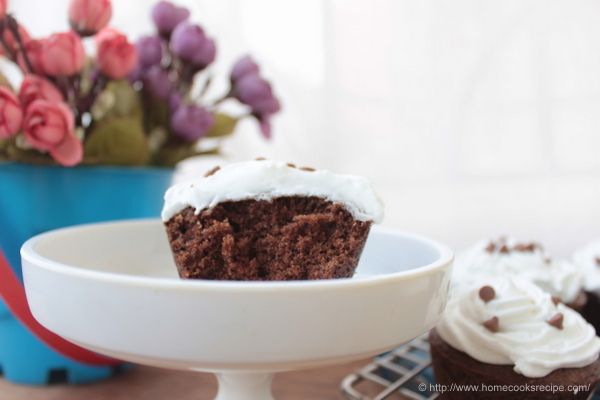
Chocolate muffins with whipped cream frosting

First i need to scream and tell you, that i am doing a work continously, it is - i am blogging here for the past five years!! Sounds Great right? Things that keeps me hooked in blogging is, mails from my readers who write up after trying recipes from here. it's like drinking some enegy drink when you read your readers mail. i wanted to share a comment which i could never forget and makes me smile, whenever i think about it.

For curd Rice - " hey lavi...m pregnant n was tempting 2 hve curd rice...i made ur recipe its delicious...........thnk you....... m happieeeeeeeee n my stomch tooooo"
Thank You Anonymous!!!! 


Did i tell you, that i was contacted by my neighbour to bake cupcakes for their get together party. and i delivered about 30 of these cupcakes. the host of the party said, everyone liked & told me, many enquired, whether i would take orders from them too!! i also made kaju katli's for my other neighbour and Eggless dates cake for a birthday party! seems everyone liked my bakes and it makes me happy!! 


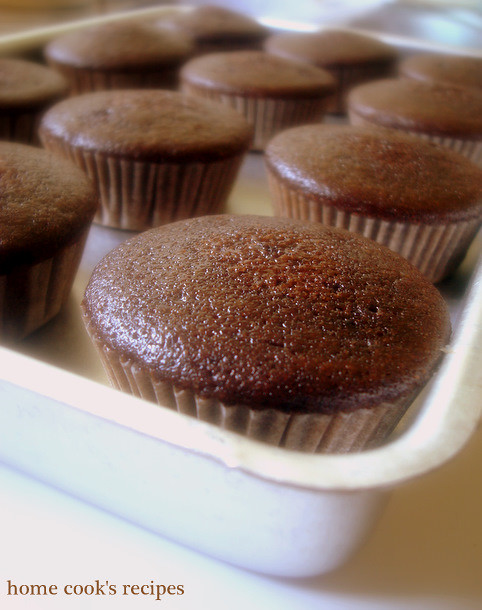
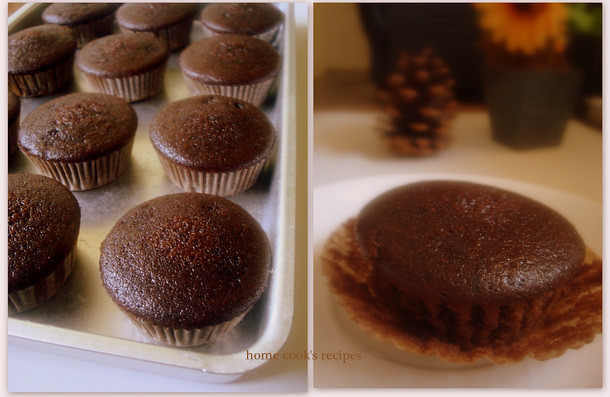
so this cupcake recipe is tried by me for more than 5 times in a row for this year alone!


makes - 18 muffins
baking time - 20 mins

Ingredients:

1 and 1/4 cup of All purpose flour / maida
1 tsp baking soda
2 tsp baking powder
a tiny pinch of salt
2 Egg's
2 tbsp of milk
1/2 cup of sugar (powdered)
1/2 cup of butter (Butter at room temperature)
1/4 cup of cocoa powder
1/3 cup chocolate chips

for whipped cream frosting:

Whipped cream powder - 50 gm / 1 pack (i used blue bird whipped cream)
Cold ice water - 90 ml

Method:

Pre-heat the oven/OTG to 200C. Line your muffin tray with cup cake liners.

Sieve the flour,baking soda, baking powder, salt and cocoa powder together for atleast two times so that the flour, mixes well with b.soda and b.powder.

In a large glass bowl, beat together the butter and powdered sugar until pale and fluffy. i used my electric mixer and it always takes about 2-3 minutes at medium speed to cream the butter pale and fluffy. Break in the egg's one by one and beating well after adding each egg.

Start adding flour to the bowl in three intervals and use your wooden spoon or spatula to fold in the flour. add milk and chocolate chips and mix everything together. Divide the batter to the lined muffin tray.

Bake for about 20 minutes, until a toothpick inserted to the centre of the muffin comes out clean. once the muffins are done, cool them for about 10 minutes.

To make the whipped cream frosting, In a seperate mixing bowl, beat together the whipped cream powder and the ice cold water(90ml.) for about 3 minutes in high speed with your electric mixer. once the cream is whipped, put the whipped cream in freezer for about 10 minutes before frosting the muffins.

Just spread a spoon of frosting over each muffins sprinkle few chocolate chips on top. it is better to to do frosting just before serving, as the frosting falls/melts down in few minutes for indian climate. or after frosting, refrigerate the muffins till you serve.


Thanks to all by blogger friends, my blog readers and commenters for all your support and love!!!


Tuesday, May 8, 2012

Eggless date cake

I know many of you might have tried out this date cake from shilpa's blog. i am joining you lately. When Nupur mentioned about the date cake in her last post, i could not resist to lay my hands on it. it was so easy to prepare, no tricky stuff's. and the outcome of the cake is just amazing. I shared the cake with my neighbors and friends. almost everyone wanted to go in for a second slice, after hearing its name"Eggless Date Cake". 

Monday, February 20, 2012

Carrot cake with cream cheese frosting

Carrot cake, i love this cake, as each piece is full with goodness of carrot. i tried this cake with wheat flour long back and loved it. this time i tried it with all purpose flour(maida). this time the cake was soft and turned out moist and good. but i recommend you to try with wheat flour, which makes the cake super healthy cake.


Monday, July 4, 2011

Sponge Cake without Butter

I tried this easy cake from joy of baking. Its such a easy breezy cake. This Cake dont call for Butter, yet it turns out moist and tastes great.


Monday, May 2, 2011

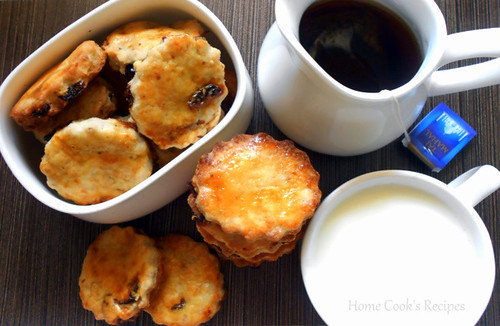
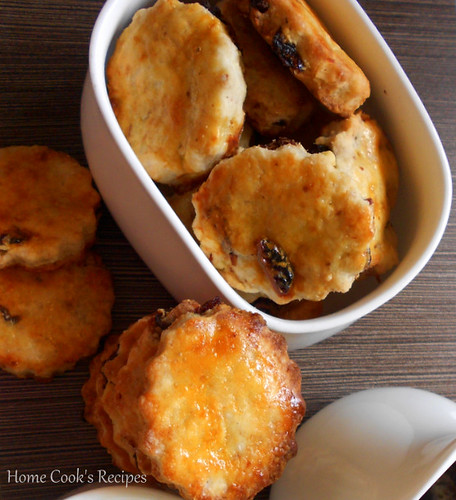
Cranberry Scones

I find Scones are very easier ones to try. Scones are always loved at Home. Last Saturday i decided to make these Cranberry scones for break-fast. A typical English Break-Fast after watching the Royal Wedding! It was easy to make and it tasted Great!! I referred Soma's Cranberry and Almond Scones and Joy of Baking to prepare these Delicious Scones.

Cranberry Scones

Ingredients:

All Purpose Flour - 1 and half cup
Dried Cranberry - 1/4 cup
Chilled Butter - 6 tbsp's
Sugar - 1/2 cup
Baking Powder - 1 tsp
Milk - 1/4 cup
Egg - 1

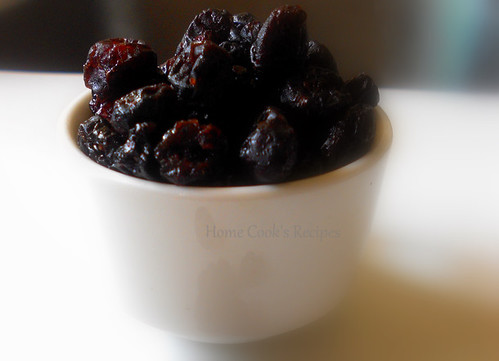
Dried Cranberry

Method:

Pre-Heat the oven to 200C.

Chop the dried Cranberries and set aside. Beat the Egg with 1/4 tsp of water and keep aside.

In a Big Bowl, add the Flour,Sugar, Baking Powder and mix well. To this add Chilled Butter and mix with your hands, the final mix should be like Bread Crumbs.

Now add Dried Cranberries and mix. Add Milk little by little, to gather the dough together. slowly knead the dough and roll the dough for 1/2 inch thickness, with rolling pin.

With the help of Cookie cutter, shape them. place them on greased baking tray with gap inbetween to let the scones expand while baking.

Give an Egg Wash over the scones just before baking.

Bake the Scones at 200c for about 15 minutes till the bottom of the scones gets golden colour.

Once Baked, let the Scones Cool down in wire wrack for about 10 minutes and Serve.

Cranberry Scones


Notes:

You can avoid egg wash and brush just with Milk.

I made the scones thinner, you can make them thick and serve with Jam.

I Grilled the scones for about 2 minutes, to make the scones crisper outside.

Tuesday, April 5, 2011

Low Fat Brownies

I love Brownies but folks at home dont, so baking brownies becomes rare. I baked these low fat brownies for Divya's Brownie Event. Iam making into the event at last minute desperately, as i very badly missed not being part of her Very Famous Best Chocolate Cake Event.

Fudge Brownies

I just want to share 2 Brownie tricks. one is Brownie takes less flour compared to Cakes. second is cooling the baked brownie for atleast 40 minutes is a must. These Low Fat Brownies dont ask for Butter, but still you will never miss butter in brownie. The Guilt part is the Egg's.

Recipe from GoodHouseKeeping's Cakes and Bakes.

Ingredients:

Makes about 12-16 brownies

Olive Oil / Sunflower Oil - 50 ml / 2oz.
Dark Chocolate - 250 gms
Egg's - 3
Demerara Sugar - 150 gms / 5 oz
Vanilla extract - 1 tsp
All Purpose Flour - 75 gms / 3oz
Baking Powder - 1/4 tsp
Cocoa Powder - 1 tbsp
Butter - 1 tsp for Greasing the Cake Tin.

Method:

Pre- Heat the oven at 180C. and Grease the Cake Tin with Butter and set aside.

Melt the Dark Chocolate by placing in Microwave for 30 seconds at 900W. or melt the chocolate by double boiler method and let the chocolate cool after melting.

Break the Eggs into a large bowl, add Oil, Sugar, vanilla extract and whisk well.

Sift the Flour with Baking powder and cocoa powder and mix the flour to the large bowl which had egg-oil whisked. Mix them all together.

Mix Melted Chocolate to the bowl. mix with a wooden spoon. mix very lightly, as the chocolate thickens up the mix so quick. Transfer the mix to the Greased pan.

Place the Pan on Oven and Bake it for 20 minutes.
Once baked, check the brownie by inserting a toothpick close to the centre of the brownie , it comes out clean.

Cut the Bownies, while its still on the pan. and let them cool for about 40 - 60 minutes in the pan.

Remove the Bownies from the Pan and Serve with Ice-Cream.

Low Fat Brownies

To Store, wrap the brownies with cling film and store it in air-tight container.


Tuesday, March 29, 2011

Eggless Chocolate Muffins

I know i went missing here for a month. I needed the break from this webworld, now i can say proudly that iam not addicted to blog or FB or WEB in total :) apart from funny thoughts flooded, i gave treat to my Depression, by making these Eggless Chocolate Muffins. This is Superb eggless recipe, suggested by Sharmilee. Its Easy, you will know when you prepare it.

Eggless chocolate cupcakes

Recipe Copied from my Eggless Moist Chocolate Cake. its a Fool Proof Recipe I tell You.
Baking Time : 25-30 mins, Yields 18 muffins.

How to Prepare Eggless Chocolate Muffins?

Wet Ingredients:

Cold Water - 1 and half cup
White Vinegar - 1 and half tbsp's
Brown Sugar (or) Sugar - 1 cup
Olive Oil (or) Canola Oil - 6 tbsp's

 Mix the above Wet ingredients in a bowl together. Let the Sugar Dissolve well.

Dry Ingredients:

All Purpose Flour / Maida - 1 and half cup
Cocoa Powder - 1/4 cup
Baking Soda - 1/2 tsp
Salt - a small pinch

Sift the flour and cocoa powder along with the salt and baking soda for atleast 3 times,

So that no lumps of cocoa powder / all purpose flour are there and also the baking soda is mixed well with the flour.

Mix the Dry Ingredients along with the wet ingredients and stir slowly. make sure no lumps are formed in the mix.

Pre-Heat the Oven to 180c and line the Muffin tray with Muffin Liners.

Pour the mix on to the Muffin tray and bake it for 25 mins exactly. Check whether muffins are baked, by insering a toothpick in the centre of a muffins, it should come out clean, else bake for another 5 mins.

Remove the Muffins from the tray and cool them on wire wrack. Let them cool down for 10 minutes.

 Put the Muffins in Refrigerator for about 2 hrs and serve chilled.

Eggless chocolate muffins

To make Icing:

Mix the Icing sugar (5 tbsp's) with warm water (1 tbsp) and beat well. spread the icing over the muffins and serve.

Notes:

Lemon Juice can be used instead of White Vinegar.

Brown sugar works perfect than Plain Sugar.

I feel cooling the muffins makes it taste better.

Well, now iam heading to my fridge to pick one muffin:)

Monday, February 28, 2011

Butter Cookies

These Butter Cookies remembered me the Butter Biscuits. During my childhood, i remember my mom used to send all the necessary ingredients for the butter biscuits in big buckets(thooku) to our nearby town villupuram. Our Helper Pushpa takes them to some bakery in villupuram and comes home with butter biscuits taking pain in lifting all along thru bus. Life at villiage surely lacks luxuries but i bet, They are Full of Memories!!

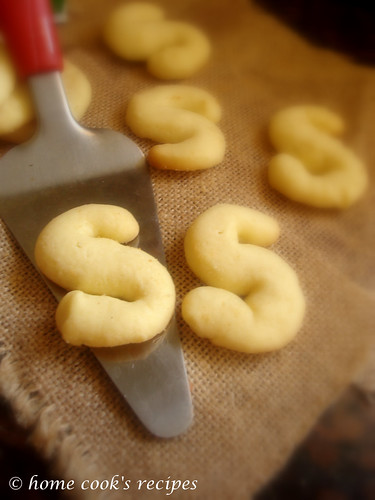
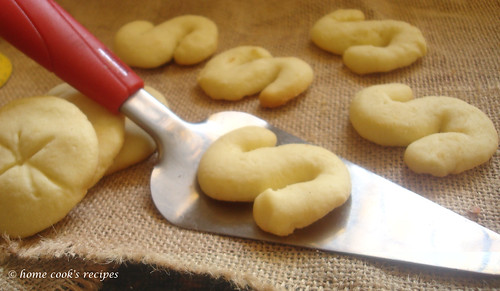
S shaped Cookies

These were Melt in mouth kind of cookies, and at home we all loved it much. When there is so much of butter will it go wrong?

Recipe for Butter Cookies:
Makes about 40 cookies
Recipe from : http://e-bookdown.com/311-cakes-and-bakes.html

Ingredients:

3/4 Cup of Butter (at room temp)
3/4 cup of powdered sugar
1 egg
2 cups of All Purpose Flour / Maida
1 tsp of baking powder
1 tsp of baking soda

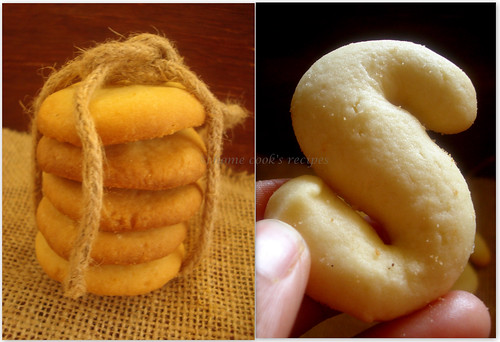
Butter Cookies

Method:

Pre-Heat the oven at 180C for about 10 mins. Line the Baking tray with butter paper or aluminium foil sheet.

Whisk a egg and keep it seperate.

In a mixing bowl, put the butter and powdered sugar and whisk until light and fluffy either with your hand mixer or a whisk. add the whisked eggs.

Sieve the flour with baking powder and baking soda for about 2 or 3 times. add the sieved flour to the mixing bowl and gently fold in. make sure to mix with spatula and fold the flour gently.

Pinch a small amount of dough, roll it with your palms to the thickness of your finger, place it on the butter paper and shape it in "S" shape.

Give enough space between cookies, so that it can expand while baking.

Bake the cookes at 180C for about 12-15 mins, till you see the bottom of the cookies turn golden in colour.

Cool the Cookies after baking and transfer them to an air tight container.

Butter Biscuits

I also made round cookies, as i did not have patience to shape all the 40 cookies. S shape was much loved by the kid! It will be a great school snack and party snack!

Note:

1.You can give egg wash over the cookies to get crisp cookies. this cookies can also be prepared without eggs.

2.The Cookie Dough can be wrapped up with cling wrap and cooled at fridge. after cooling, knead them gently and roll them off into 1/2 inch thickness. you can then use cookie cutter over the rolled dough and furthur bake them.

3. The Actual recipe used silvered almonds as the topping to the cookies, do try it out to.

Tuesday, December 28, 2010

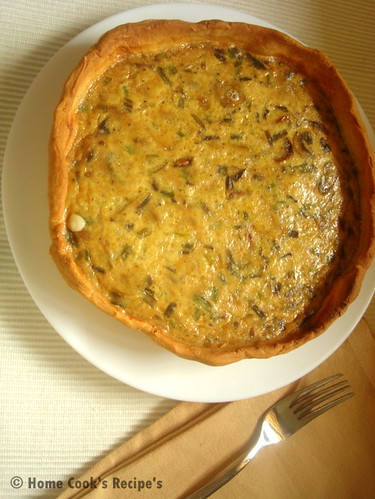
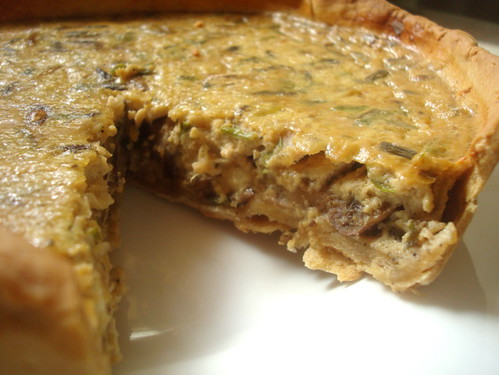
Onion Mushroom Quiche with Wheat Crust

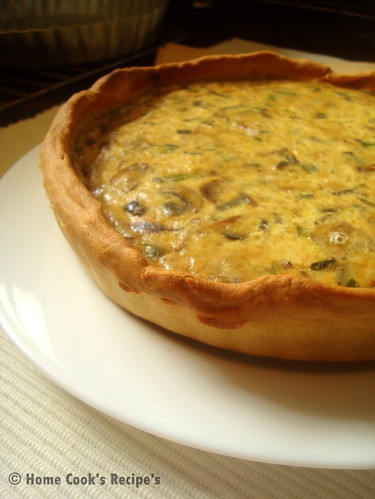
Quiche is a baked dish of French Cuisine. It has a crust as the base and the filling made with milk, eggs and cheese is baked over the crust. This could be the introduction, that i can give you based on wiki. but my definition to it is, Quiche will taste like a Rich Egg Omelette. Yes The filling in the quiche normally has eggs, milk and cheese which gives the omelette taste. But this Onion Mushroom Quiche Tasted the best, with spring onions in it. the butter infused mushroom, onions and spring onions makes this Onion Mushroom quiche an Unbeatable One.

Mushroom Quiche

Quiche, somehow i got fascinated by the name and the way it looked. and it leaded me to try my hands on it six months back. but i made the pie crust with wheat flour, which came out crispier and without any guilt, we were able to eat the quiche. Last Weekend, i decided to prepare the Mushroom Quiche with All Purpose Flour/Maida, and it came out as per its law. very flaky and acted as a soft base to mushroom filling. But I like the Wheat Crust, which was crisp and nice. and so you see me blogging this quiche after 6 months.

Ingredients for the Wheat Crust:

Wheat Flour - 2 cup's + 2 tbsp(for dusting)
Cold Butter - 100 gms
Salt - a pinch
Baking Powder - 1/4 tsp
Ice water - 1/2 cup

Quiche


How to Prepare the Crust/ Pie Shell?

Have Wheat flour in a wide bowl. Add salt and baking powder to the wheat flour and mix well. Slice the cold butter into thin slices. add to the wheat flour and mix well, so that all looks like Bread Crumbs. After that add chilled water and mix all the flour together to form a dough. Basic rule here is to not knead the dough too much, because kneading may reduce the gluten content in the dough. hence you wont get any flaky crust. After kneading them to a pilable dough, wrap the dough with a cling film and refrigerate for atleast 30min to 2 hrs. Just before baking the pie crust, remove them from fridge and let it sit at room temperature for 5-10 mins.

Pre-Heat the Oven at 180C. Roll the Crust Dough by dusting some flour. roll them out evenly. then line it over the Tart Pan. Leave enough heights for the shell, as it may shrink after baking. Trim the extra dough with a kitchen scissor. Line the Shell with a aluminium foil sheet. add uncooked rice or some Rajma or Chickpeas to give some weight over the shell, so that the crust dont raise, while baking and hence it gets evenly baked.

Bake the Pie crust for about 12-15 minutes at 250C in the bottom wrack of the oven. after baking the crust to golden colour, remove the foil sheet with the rice or some pulses carefully. let the pie shell rest in wire wrack.

Ingredients for the Filling:

Mushroom - 200 gms
Onions - 2
Spring Onions (Green Part) - 1 cup (chopped)

Butter - 2 tbsp
Pepper Powder - 1 tsp
Salt to taste

Eggs- 3
Milk - 1 cup
Cheese - 2 tbsp grated [Mozarella or Cheddar cheese]

* I added comparitively less cheese, but usually the recipe will call for atleast 1/4 of cheese.

Quiche

How to Prepare the Filling?

Heat Butter in a Pan, add chopped onion and fry it. then add chopped mushroom and spring onions and saute them along. add salt to taste and pepper powder and give a mix. Reduce the flame and close the pan with its lid and let it rest in slow flame for about 5 minutes. This is to make the mushroom mix absorb the flavour of butter.

Beat the Eggs and add 1 cup of milk to it and mix well. also add cheese and give a mix.

Assembling the filling over the piw crust:

Take the Baked Pie crsut and layer it with the onion mushroom mix. then add milk+egg filling over the mushroom's. Now carefully transfer to the oven's middle wrack and bake the Quiche at 180C for about 40 mins.

After 40 minutes, insert a toothpick in the centre of the quiche and check whether it comes out clean, to know, its fully baked. if its not baked, bake it for another 5 minutes.

After baking, remove them from oven and let it rest for 5 mins and them remove the quiche from tha tart pan, to serve.

Wednesday, December 1, 2010

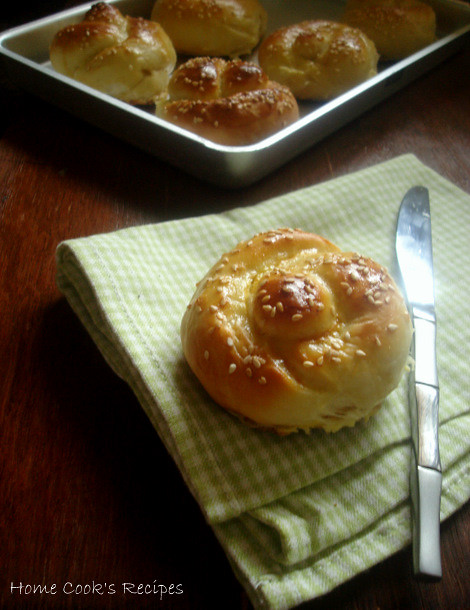
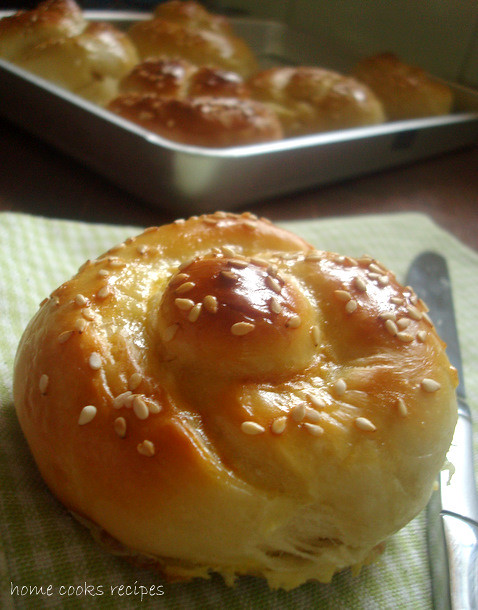
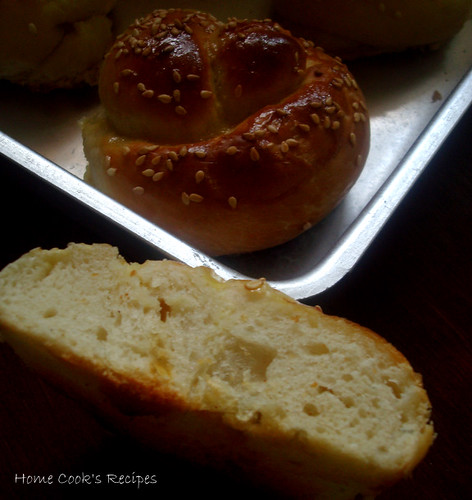
Dinner Knots

Iam trying to make breads or work with yeast since 2008 december, thats when i bought my Microwave Convection Oven. I was not at all satisfied baking breads in convection mode. then i got my OTG, which did'nt disappoint me. I keep on trying stuffs with yeast, rather than cakes. On one of my try, these dinner knots came out so so so Perfect for me. They turned out so soft and Flaky. Now its here to be presented for you All..

Dinner Knots

Ingredients:

Active Dry Yeast - 1 tbsp
Sugar - 1 tbsp
Warm Water - 1/2 cup
Warm Milk - 1/2 cup
Olive Oil - 1/4 cup
Egg - 1 beaten
Sea Salt - 1/2 tsp
All Purpose Flour / Maida - 3 and 1/4 cup (divided)

Egg Glaze:

1 egg
1 tbsp of water
Sesame seeds for topping

Dinner Knot

Method:

Warm half a cup of milk and dillute half a cup of warm water. Mix Sugar and Yeast with the dilluted milk and mix with a spoon. try to mix as much so that the yeast and sugar gets dissolved. close it and keep aside for 5 - 10 minutes, till frothy layer is developed due the activeness of the yeast.

Now in a wide bowl, add 1/4 cup of Olive Oil, add beaten egg to the oil and keep whisking with a whisk. add sea salt and whisk vigorously. Now add the yeast mix and keep whisking.
Now add 1/2 cup of flour and whisk, keep adding the rest of flour as half cup at a time. when the whisk clogs with the dough, shift to a wooden spoon and mix. then start mixing with hands and knead the doough for atleast 5 minutes. add little olive oil in the end and knead it once.

Take a Bowl, grease it with olive oil and place the kneaded dough and cover it and rest it for 1 and half hours atleast so that the dough gets doubled in size.

Line the baking tray with baking sheets. Pinch a small portion of the raised dough and roll it like a rope about 7 inch long and 1 inch wide.Now Cross one side of the rope over the other to form a Loop. Now take a tip of  the rope that is on top and tuck it under and through the centre hole to tie loosely into a knot. One of the rope should pop up through the loop hole.

Place the knots on the greased tray, each 2 inches apart from each other and cover loosely with a plastic wrap and let it rise for 10 minutes.

Pre-Heat the oven at 190C for 10 minutes and bake the dinner knots for about 18-20 minutes. Beat a Egg with 1 tbsp of water and with the help of a brush, brush it on top of the knots. and sprinkle some sesame seeds over then keep them on oven in broil mode for 3-4 minutes to get the browning effect on top.

Then Remove from the oven and let it cool and Serve.

Hot Bun

I served these Dinner Knots with Jam to my kid and we had it with Soup. It was all together a New Dinner Experience for us on that Day!


Thursday, August 26, 2010

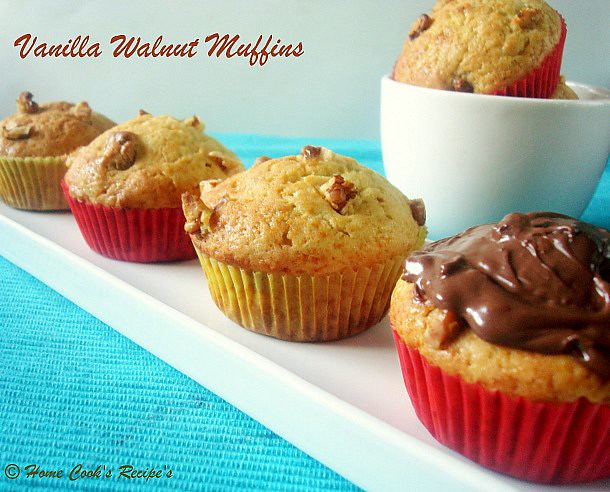
Vanilla Walnut Cupcakes

Cupcakes would be our evening tiffin in our hostel. I remember eating them in my boarding school and also in college hostel. Only one cupcake will be served, and it would never be sufficient for us. till the dinner is ready, we had to starve or some times we head to canteen, to have Noodles or fried rice. I usually have a partner to share one plate of Veg fried rice / Noodles. chatting and eating with her would be a great time. Iam really glad, that me and my partner are food bloggers now.  we would also go to movies on thursdays, as we both used to have free periods on thursday. and more than that, one thing bonded us was, we hailed from the same native place. I was thinking all this while baking these cupcakes.


You all might know, that i was not actively blogging, for the past two months. Sharmilee of Sharmi's passions gave me a Good Push, to blog frequently. I hope, i will maintain this pace in the coming weeks too. as her first event, she is hosting, is getting over by today, i wanted to submit my entry too to her. As i sleep along with my son, in the afternoon, i miss catching up with blogs or baking. but today, in my half-way through the sleep, i woke and went and baked these cupcakes, to send her this sweet little entry. Here, Walnut Cupcakes are for you Sharmilee.


Vanilla Walnut Cupcakes

 
Ingredients: (8 to 10 cupcakes)

All Purpose Flour / Maida - 1 and half a Cup
Baking Powder - 1/2 tbsp
Baking Soda - 1/4 tsp
Butter - 50 gms
Sugar - 1/2 cup
Vanilla essence - 2 tsp's
Egg's - 2
Warm Milk - 2 tbsp's
Chopped Walnuts - 4 tbsp's

Method:

Pre-Heat the Oven at 190C for 10 minutes. Line the Muffin Pans or grease the muffin pans with little butter, if you dont have muffin lining papers.

Sift the Flour, Baking Powder and Baking Soda atleast three times.

Powder the Sugar.

In a Mixing Bowl, Have the butter at room temperature. add powdered sugar and beat well either with a hand whisk or hand blender.

After Creaming the Butter with Sugar, Break egg's into them one by one and beat well.

Add Vanilla essence to the bowl and beat well.

Now add sifted flours little by little and mix with a wooden spoon.  add little milk and give a mix with the wooden spoon.

Add chopped walnuts and give a soft mix. and drop a spoon full of mix onto the lined muffin pans.

Bake the Cupcakes for 15-18 minutes at 190C. or till a toothpick inserted into the centre of the cupcake comes out clean.

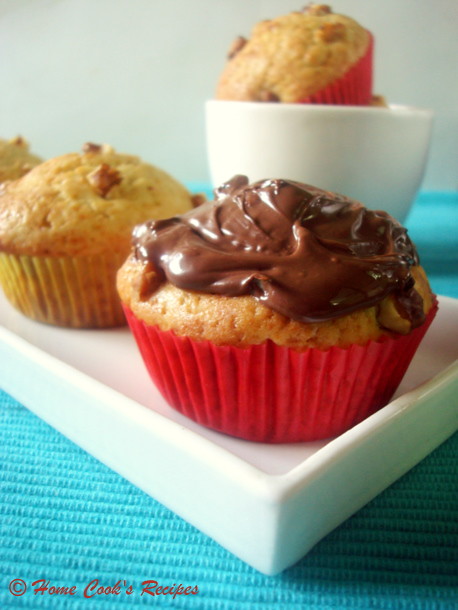
Walnut Cupcakes with Nutella Frosting

After Baking, cool the cupcakes for atleast 10 minutes.

 I frosted the cupcake with Nutella. It was yummy, though the frosting patterns was difficult for me.

The Cupcakes was great in taste. the sweetness was just correct. If you are planning for frosting, go ahead with the same sugar amount mentioned in the recipe. if not using frosting, increase the sugar amount by 1/4 cup.

Vanilla Walnut Cupcakes are heading on the last train to Sharmi's Let's Munch - Light Tea Time Snacks.

Wednesday, August 11, 2010

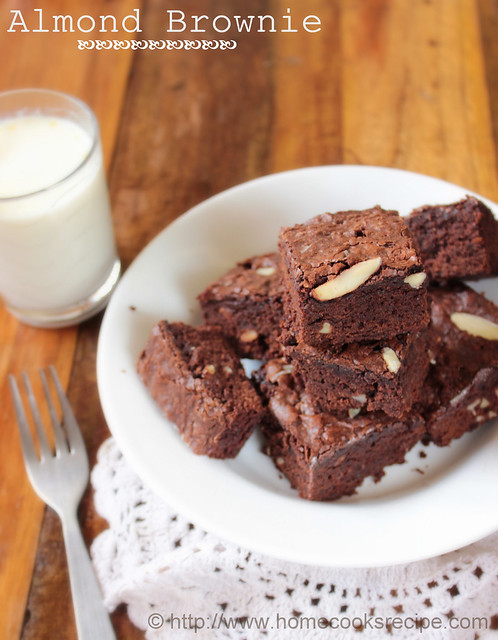
Almond Brownies


I am a brownie addict. whenever i buy dark chocolate bars, i turn them into delicious Brownies. Last week, it was a brownie week for me, as i tried two variety of brownies, one was low fat banana brownie and the other is this almond brownie. banana brownie, varied from the usual ones, for me, it tasted much like banana-chocolate halwa!!

Almond Brownie

But this almond brownie came out so perfect. I could proudly say, this is one of my best from my baking experiments.  now this brownie is attending Brownie event at divya's place. This is such an easy method, coming to the recipe.

Brownies
Recipe for 12-14 squares


Dry Ingredients:

All Purpose Flour - 1 cup / 200gms
Baking Soda - a small pinch
Salt - a small pinch
Sugar - 3/4 cup
Cocoa Powder - 3 tbsp's


For Wet Ingredients:


Dark Chocolate - 150 gms
Butter - 75gms
Eggs - 2
Milk - 1/3 cup
Almonds - 15 (Grated)

How to Prepare?

Pre-Heat your Oven at 180c / 330F. for 10 minutes. Line a Baking Bowll with a aluminium foil sheet or butter paper.

Get ready with your Double boiler or Heat 3 cups of water in a bowl, let the water boil. Simmer the flame.
Place another fitting bowl, with Dark Chocolate and Butter over the bowl of hot water.


Let the Chocolate and Butter Melt together and turn into a chocolate sauce like one. Switch off the flame and remove the bowl.

Break an egg to the chocolate - butter sauce and mix well. break another egg and mix well.


Mix all the Dry Ingredients together and sift them twice.

Now add the mixed Dry Ingredients in 3 batches to the chocolate-Butter-Egg Mix and mix with a wooden spoon. add little milk, if the consistency of the batter is too thick. Add Greated Almonds and give a mix.


Pour the mixed batter to the lined baking bowl. Top them with some grated Almonds.


Bake at 180c for about 40 - 45 mins. till a toothpick inserted in between the centre and the corner of the bowl comes out clean. Remove the Baking bowl and dont disturb it for 10 minutes.

After 10 mins. Remove the Brownies along with the foil sheet and cool them on a board or wrack. Allow the Bownies to cool for 45 minutes to 1 hr. Cut the Brownies into squares or bars and store them.

Almond brownie

What I learned from this attempt?

- Need not cream the butter and sugar. and also need not beat eggs into the mix. all these yields a crumble brownies.
- Allow the Brownie to cool down completely with patience, and then cut them into squares.

-Never over bake the brownies.

Thanks Raji for pushing me to try these Great Brownies.

Wednesday, July 7, 2010

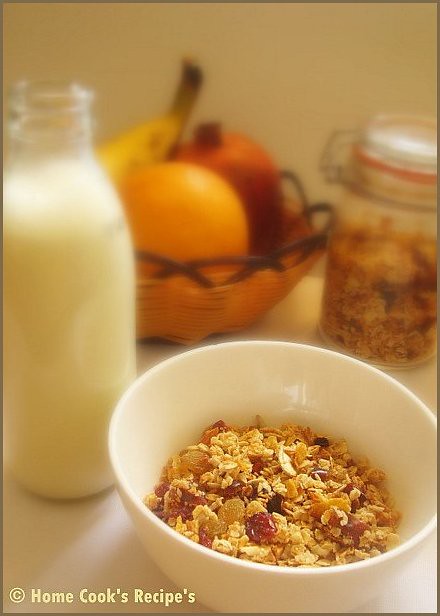
Granola or Muesli

In India, we have not seen or heard about Granola, but Muesli is a Popular break-fast next to Cornflakes. Sometimes, while trying some stuffs like Cornflakes and Oats for break-fast, i think, why iam giving this to my family, leaving our own idli, dosa's. am i trying to follow Western Food Culture? Certainly Not. I feel, whats wrong in eating this, when its healthy? What do you feel, should people follow their Geographical Food Culture or not?  would love to know your views over it.

Granola

My mom is the one, who introduced me Muesli, when i complained her about Constipation Problem. I dont know, how she knew about this, but taking Muesli or Granola really helps out for Constipation problem, because it has Fibre rich Oats, Nuts and Raisins in it.

Before Going into the recipe, from what i learned from Wiki, Muesli is - the raw form of Granola is Muesli. I guess Muesli has unbaked oats in it. After knowing, that Granola can be prepared at home, will anything stop me?
Recipe for 5 - 6 single servings.
Ingredients:

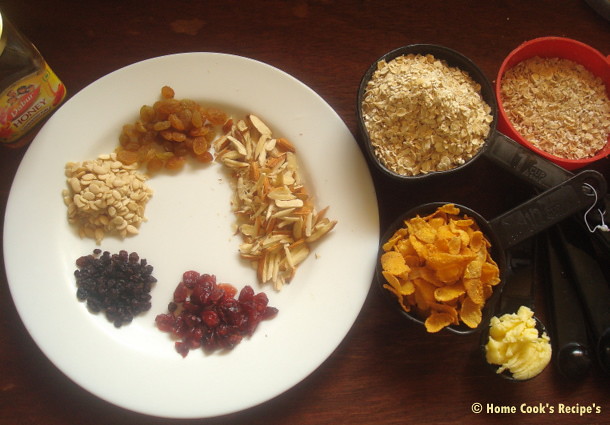
Ingredients for Granola

2 Cups of Quick Cooking Oats
1 Cup of Cornflakes (optional)
1/4 Cup of Honey
1 tbsp of Butter

6 almonds - chopped
1 tbsp Pumpkin Seeds
2 tbsp Melon seeds
2 tbsp Sunflower seeds

Black Currant - 2 tbsp's
Raisins - 2 tbsp's
Dried Cranberries - 2 tbsp's
Seedless Dates - 5 (chopped)

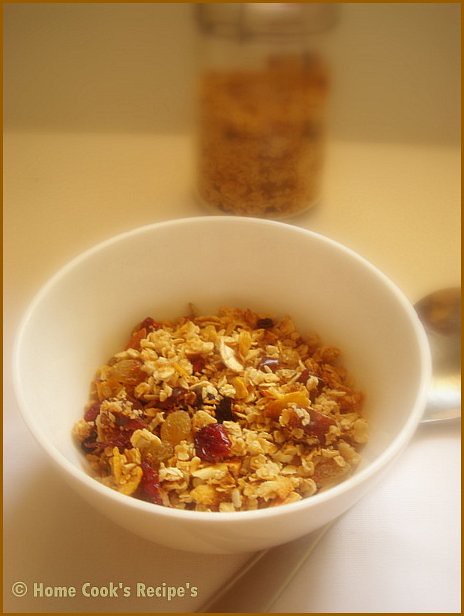
Home-made Granola

Method:

Mix the Oats with the Cornflakes, almonds and seeds. add Butter and Honey and mix well.

Pre-heat the Oven to 150C. Line your baking tray with a aluminium foil sheet. spread the Oats mixture over the tray.

Bake the Oats Mixture for about 10-12 minutes, till the Oats turn into Golden Colour. Take Care not to Brown them. It browns so quickly. so keep an eye over it while baking.

Cool them down after baked and mix raisins, black currant, dried cranberries and Dates to the Oats mixture and store them in an airtight Jar.

 Granola with Milk

* Since i made these Granola in a small batch, for me, it kept well for a week long.
* It tastes Good just as it is. so its a healthy snack.
* Serve with Milk and some fruits like Banana. its so heavenly.
* I could not find Rolled Oats, so if you are using Rolled oats for this, then baking time should be increased for another 10 - 15 minutes.
* Dried Cranberreis and other seeds mentioned in the recipe can be found at Nuts and Spices stores.
* I strongly recommend Saffola Oats (newly introduced). Saffola Oats are really Good. At Present those Saffola Oats are available only at Big Bazaar and at Star Bazaar as of now.

Wednesday, June 16, 2010

Spicy Paneer Stuffed Bread

I find very difficult to find time, even to check mails, in such case, blogging has become a dream to me. As hubby dear had gone to Paris, Managing home alone is a tough task. Time goes so slowly, and now i realise, how helpful was my hubby, all these days. A Person's absence brings the Person so close is absolutely True. I experience it right now!

Stuffed Bread

Last week, Chennai got rains, and we enjoyed the climate very much. as a part of it, i loved to spend time in kitchen making these Spicy Stuffed Bread. This was prepared after getting inspired from Ari's Baking and Book's Hot Pockets.I customised the Filling / Stuffing the Indian Way and its the best way to impress an Indian Tummy, I bet!


Ingredients: (Makes 8 thin rolls)

Wheat Flour - 1 cup
Maida / All Purpose Flour - 2 and 1/2 Cup's (Divided)
Active Dry Yeast - 2 tsp
Sugar - 2 tsp
Warm Milk - 1/3 cup
Warm Water - 1/3 cup
Salt - 2 tsp
Egg -1
Sunflower Oil - 1/3 cup

For the Stuffing:

Indian Tomato Pickle / Thokku
Mozarella Cheese
Paneer / Cottage Cheese
Egg - 1 (for egg wash)
Sesame Seeds

Method:

Warm the water and Milk and mix together. Add Dry Yeast and Sugar to it and mix well, till the yeast gets mixed. let them rest for 10 minutes, till the yeast mix, turns frothy.

In a mixing bowl, mix the Oil and one Egg. beat it well. Add the Yeast mix to the bowl.

Add Wheat Flour to the bowl and mix. Now add all purpose flour - 1 cup and mix well. add another one cup of all purpose flour and mix, combine all the flour together and make it as dough ball.

Knead the Dough ball, with the help of the 1/2 a cup of all purpose flour, for atleast 10 minutes.

Grease a Glass bowl, with little oil and put the kneaded dough into the bowl. wrap the bowl with a cling sheet and let the dough raise for about 1 and 1/2 an hour.

After the Dough has raised, pinch a lemon sized dough and roll it, by dusting some flour for help.


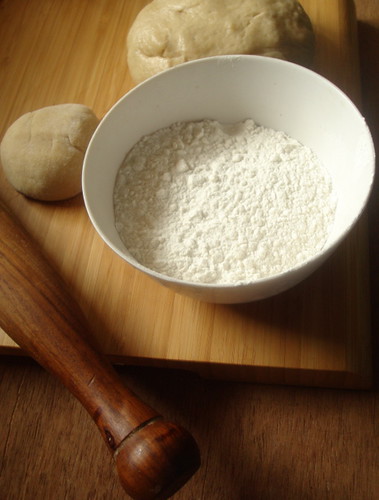
a pinch of raised dough and flour to dust,
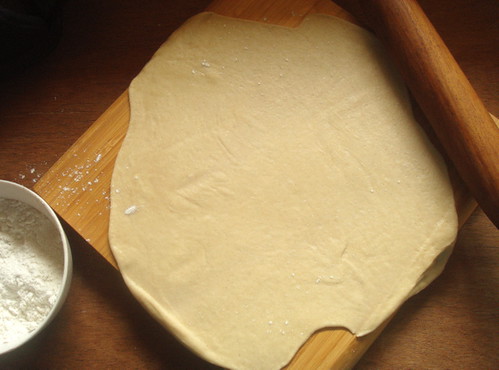
 ready for rolling

Get Ready with the stuffing ingredients. also mix an egg with a tbsp of water and beat well with a fork, for egg wash.

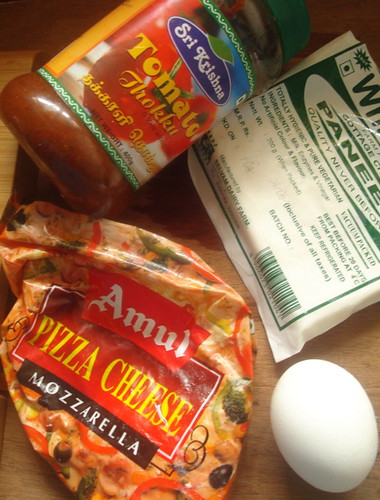
Tomato Sauce, Mozarella cheese, egg for egg wash and some Paneer

Roll the dough very thin.

a pinch of dough rolled thinly

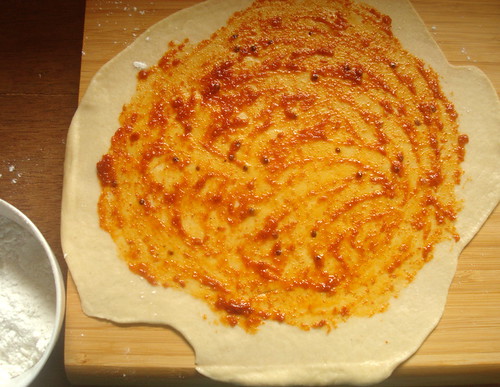
Spread a tsp of Indian Tomato Pickle / Thokku in the centre of the rolled dough.

Tomato Sauce / thokku spread

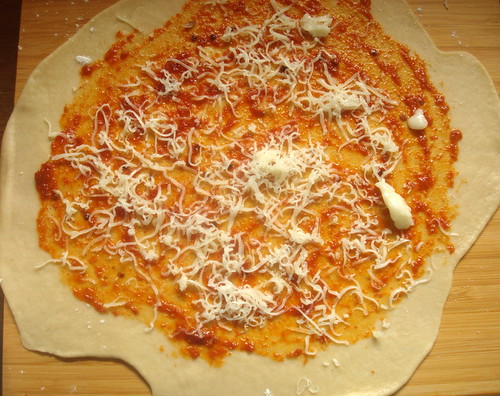
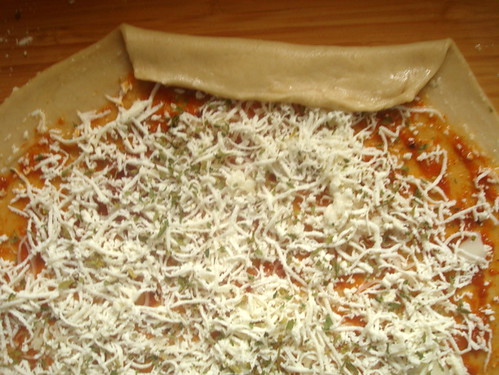
Grate some Mozarella chesse over the Tomato Pickle.
some mozarelle grated over

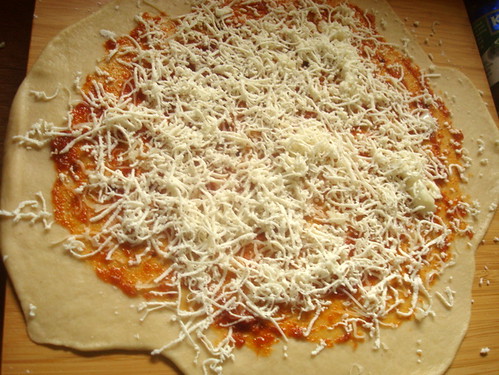
Grate Some Paneer over the cheese.

some Paneer grated

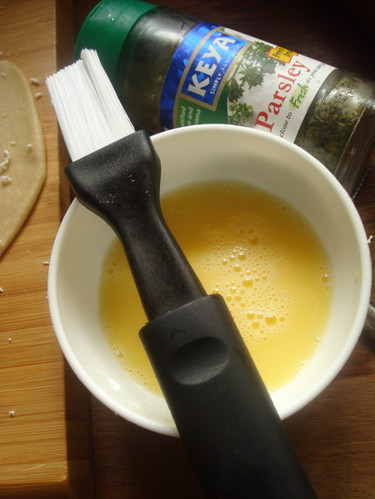
Get ready with Egg wash by breaking a egg into a small bowl. mix a tbsp of water to the egg and beat with a fork. and get some dried parsely, to sprinkle over the paneer stuffing.

egg wash kept ready

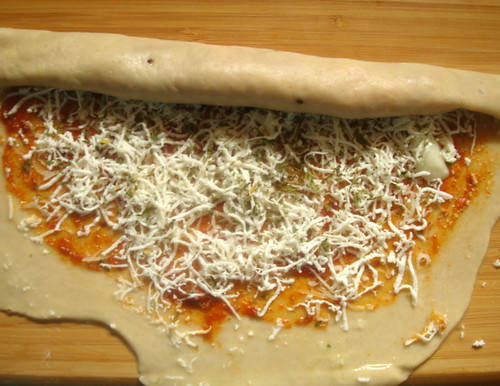
Start Rolling the Dough slowly.

First step in rolling

Rolling in Progress...

rolling in progress

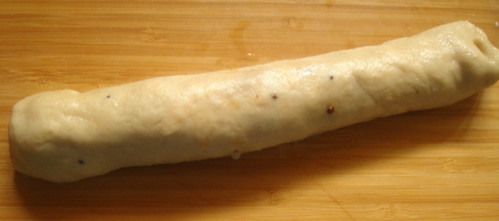
Roll them fully and close the sides of the roll. (those are the mustard's from the pickle popping out..)

rolled and edges sealed

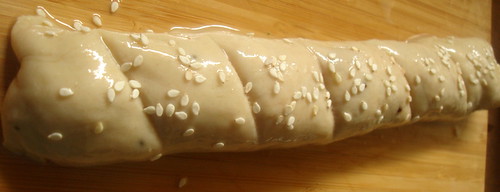
Make some incisions over the roll and give a egg wash and sprinkle some sesame seeds over the top of the roll.
some cuts and sprinkle sesame seeds

Pre-Heat the oven at 375F / 180C. and Bake the roll for 45 mins. and let it cool for 30 minutes before serving.

Spicy Indianised Stuffed Bread

The Spicy Paneer Stuffed Bread is Ready!! It tasted so Good. Yes the spicy of tomato pickle, cheese were the enjoyable part of the roll. I felt some more veggies could also be added, as the stuffing was not bulk.

Do try it out, if you like spicy breads!

This is the first time, iam trying step by step pictures sort of post.Hope you all like it!

Related Posts Plugin for WordPress, Blogger...